VCD.
4) Personal
Aunque los valores se han elegido con minuciosidad por nuestros
ingenieros, los valores preconfigurados pueden no resultar cómodos a
sus ojos dependiendo de su gusto.
Si es así, ajuste la Luminosidad y el Contraste usando el menú de OSD.
3. Botón Brightness
[]
Si el sistema OSD está desactivado, pulse el botón para ajustar la
luminosidad.
2,3. Botón Reguladores
[]
Estos botones le permiten destacar y regular items en el menú.
4. Botón Enter [ ] /
Botón Source (Fuente)
Se usa para seleccionar el menú OSD. /
Cuando pulse el botón Source, puede seleccionar la señal de video
mientras que el OSD está desactivado.(Cuando se pulsa el botón Source
(Fuente) para cambiar el modo de entrada de información, aparece un
mensaje en el centro de la pantalla que muestra el modo de señal de
entrada de información seleccionado actualmente -- analógica o digital.)
Nota:Si se selecciona el modo Digital, se debe conectar el monitor con la
tarjeta gráfica a través de un puerto digital mediante el cable DVI.)
5. Botón Auto "Auto" permite que el monitor se autoajusta a la señal de video entrante.
6. Botón de suministro
de energía
Use este botón para prender y apagar el monitor.
7. Indicador de
suministro
de energía
Indica modo normal o Modo de Ahorro Energético.
ea Ahorrador de Energía, descrito en el manual, para mayor información en lo referente a las funciones
de ahorro de energía. Para ahorrar energía, apa
ue el monitor cuando no lo necesite o cuando no lo use
por periodos largos de tiempo.
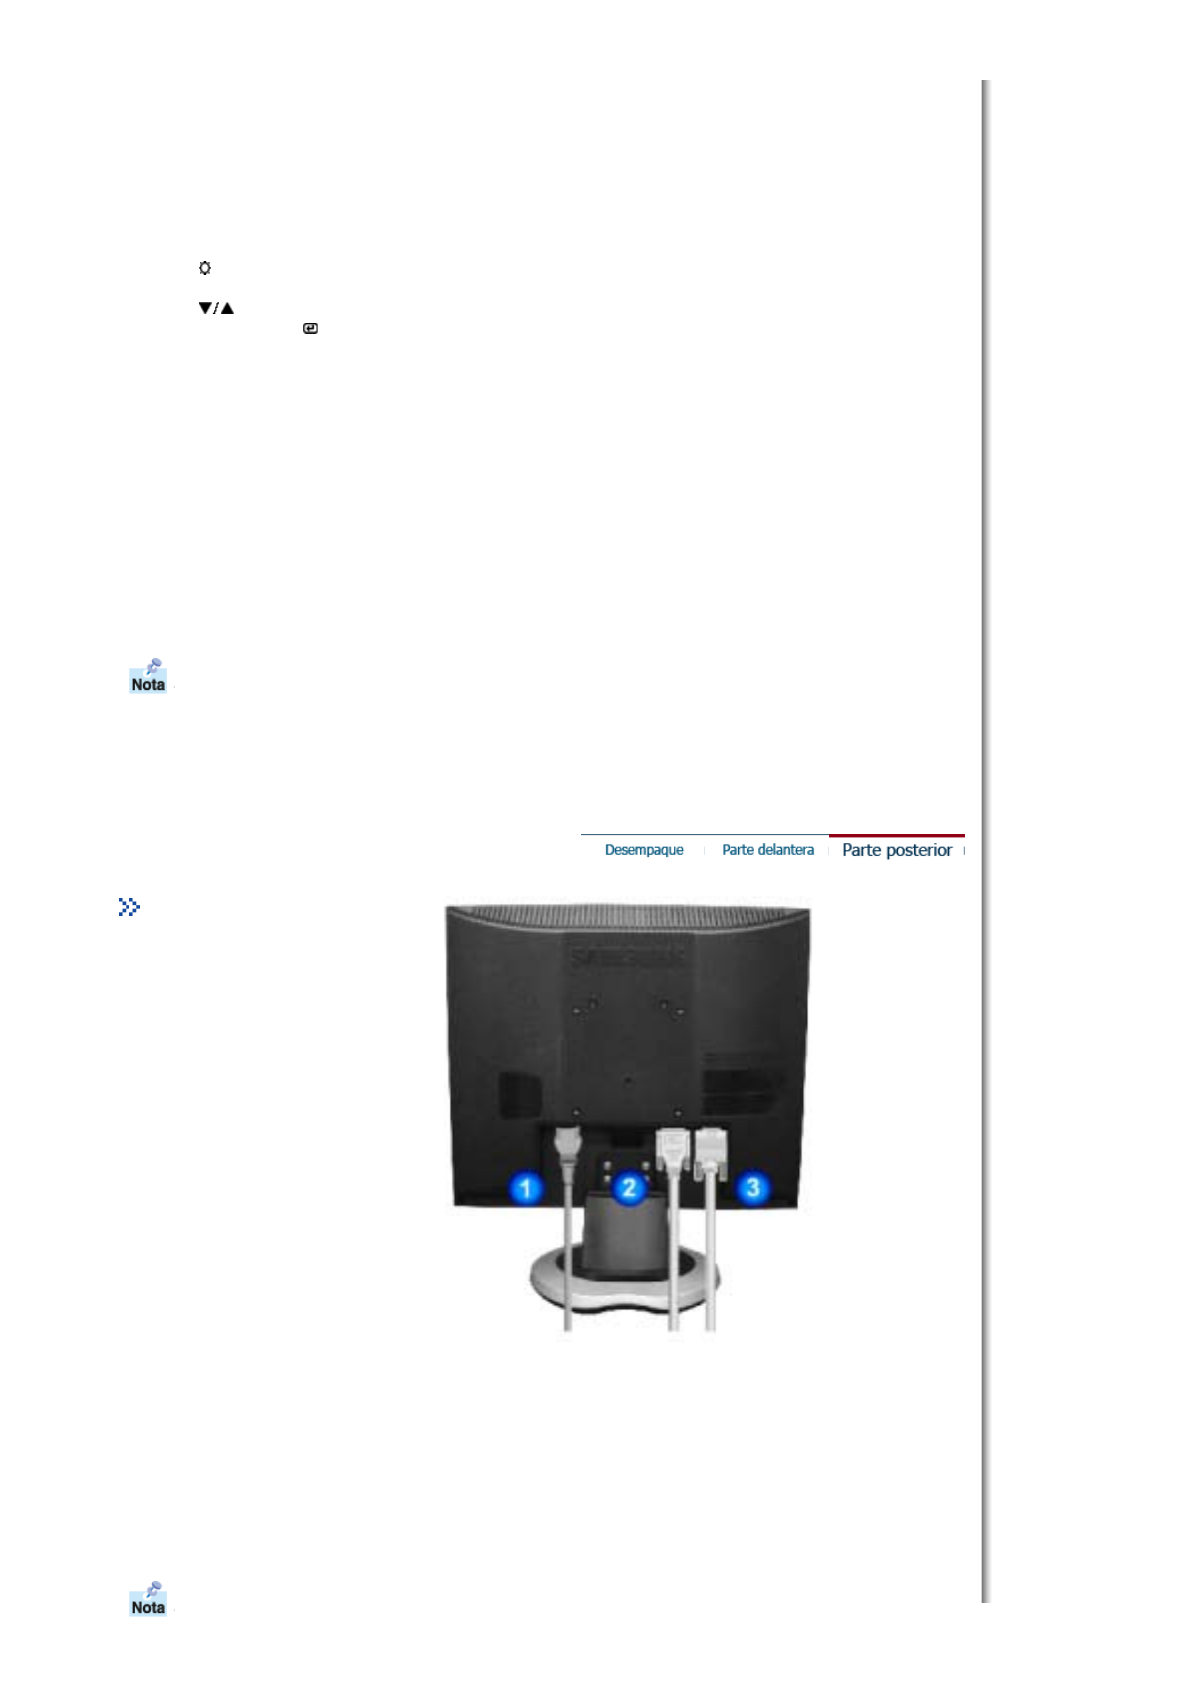
Parte Posterior
(La disposición en la parte posterior del monitor podría variar de producto a producto)
1. Toma de corriente Conecte el cordón de suministro eléctrico del monitor a la toma de
corriente de la parte trasera del monitor.
2. Puerto DVI Conecte el cable DVI al puerto DVI que está ubicado en la parte posterior
del computador.
3. Puerto D-SUB de 15
pins
Conecte el D-SUB de 15 pins del cable de señal del vídeo al conector de
vídeo del PC en la parte posterior del monitor.
ea Conexión del Monitor para mayor información en lo referente a las conexiones de cable.


