2-17 Installation and Connection
2-17 Connecting to a Network
This product can use network functions. Refer to the following Network connection method.
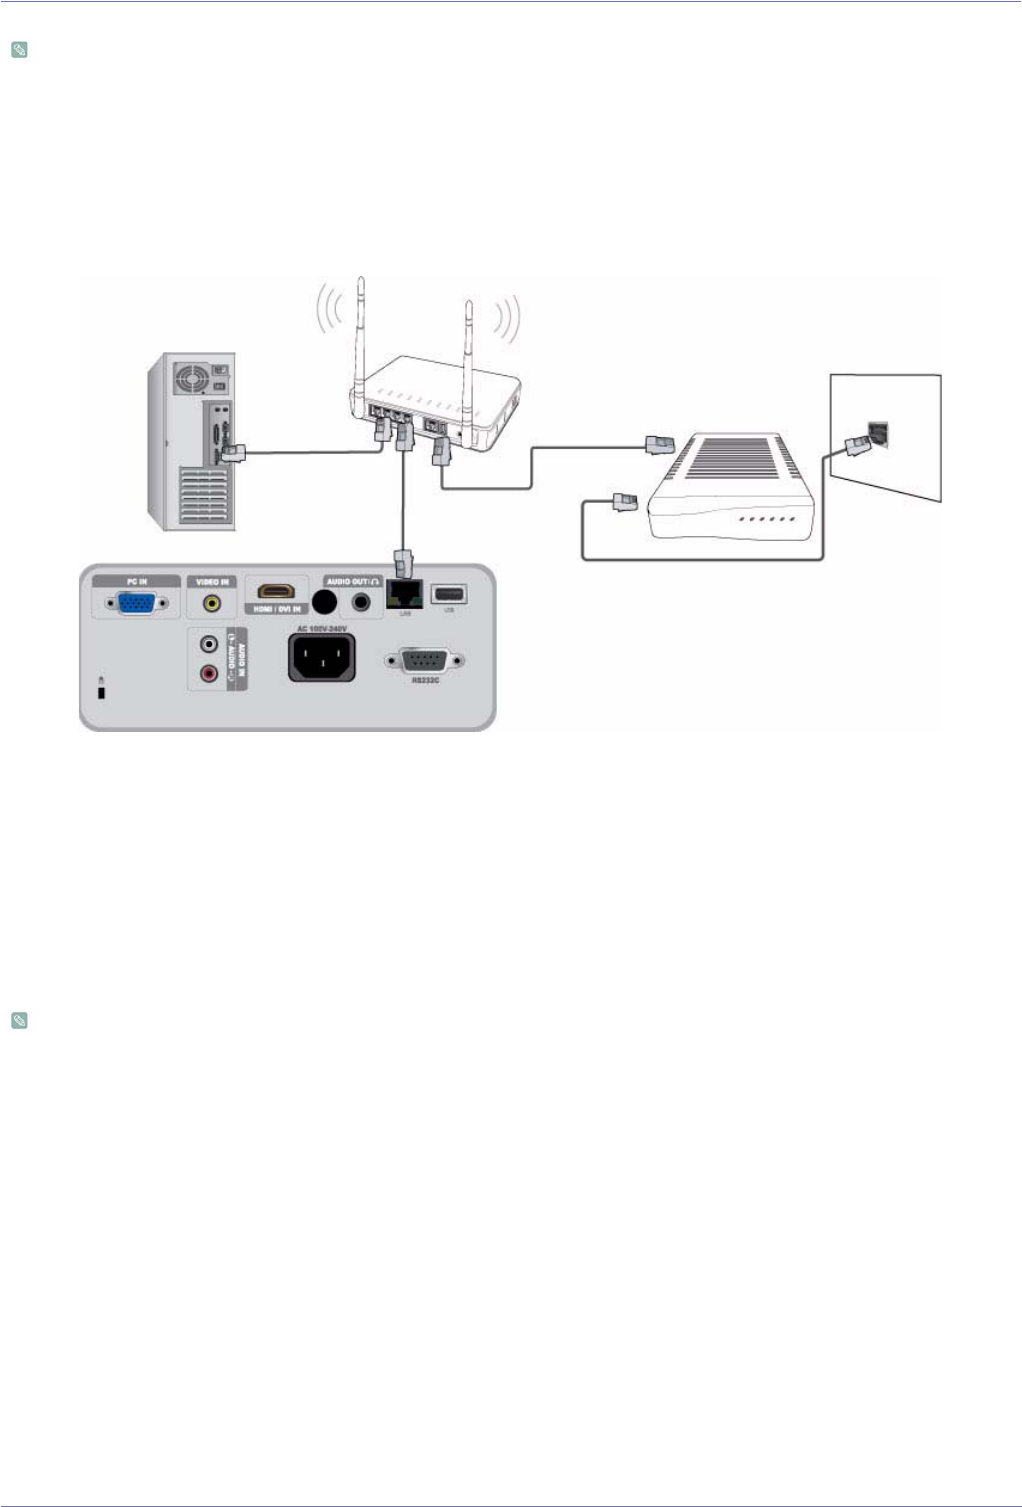
2-17-1. Connecting to a Dynamic IP (DHCP) Network
You can attach the projector to your network through a modem that uses DHCP (Dynamic Host Configuration Protocol). When
you use a DHCP modem, the modem automatically provides the IP address, subnet mask, and gateway values that the projector
needs to access the network.
To connect to a DHCP network, follow these steps :
1. Connect the modem cable between the modem port on the wall and the external modem.
2. Connect a LAN cable between the external modem and the wired or wireless IP router.
3. Connect a LAN cable between the [LAN] port on the back of the projector and the wired or wireless IP router.
4. Turn the projector on and press the [MENU] button.
5. Select <Setup> → <Network> → <IP Setting> → <Automatic>.
6. The projector automatically acquires the IP address, Subnet mask and Gateway.
• To use the network function, <Network> must be set to <On>.
• If the IP address allotment from the DHCP server fails, turn off the external modem for more than 10 seconds, restart the
modem, and then retry the connection.
•
For instructions on the setup and connection of the external modem and router, refer to the user manual for each product.
•
You can connect the LAN cable from the modem directly to the projector, You do not need a router.
• You can not use a manual connection-type ADSL modem because it is not a DHCP-type device. Make sure to use an
automatic
connection DHCP ADSL modem.


