6
GETTING STARTED
Operation
panel
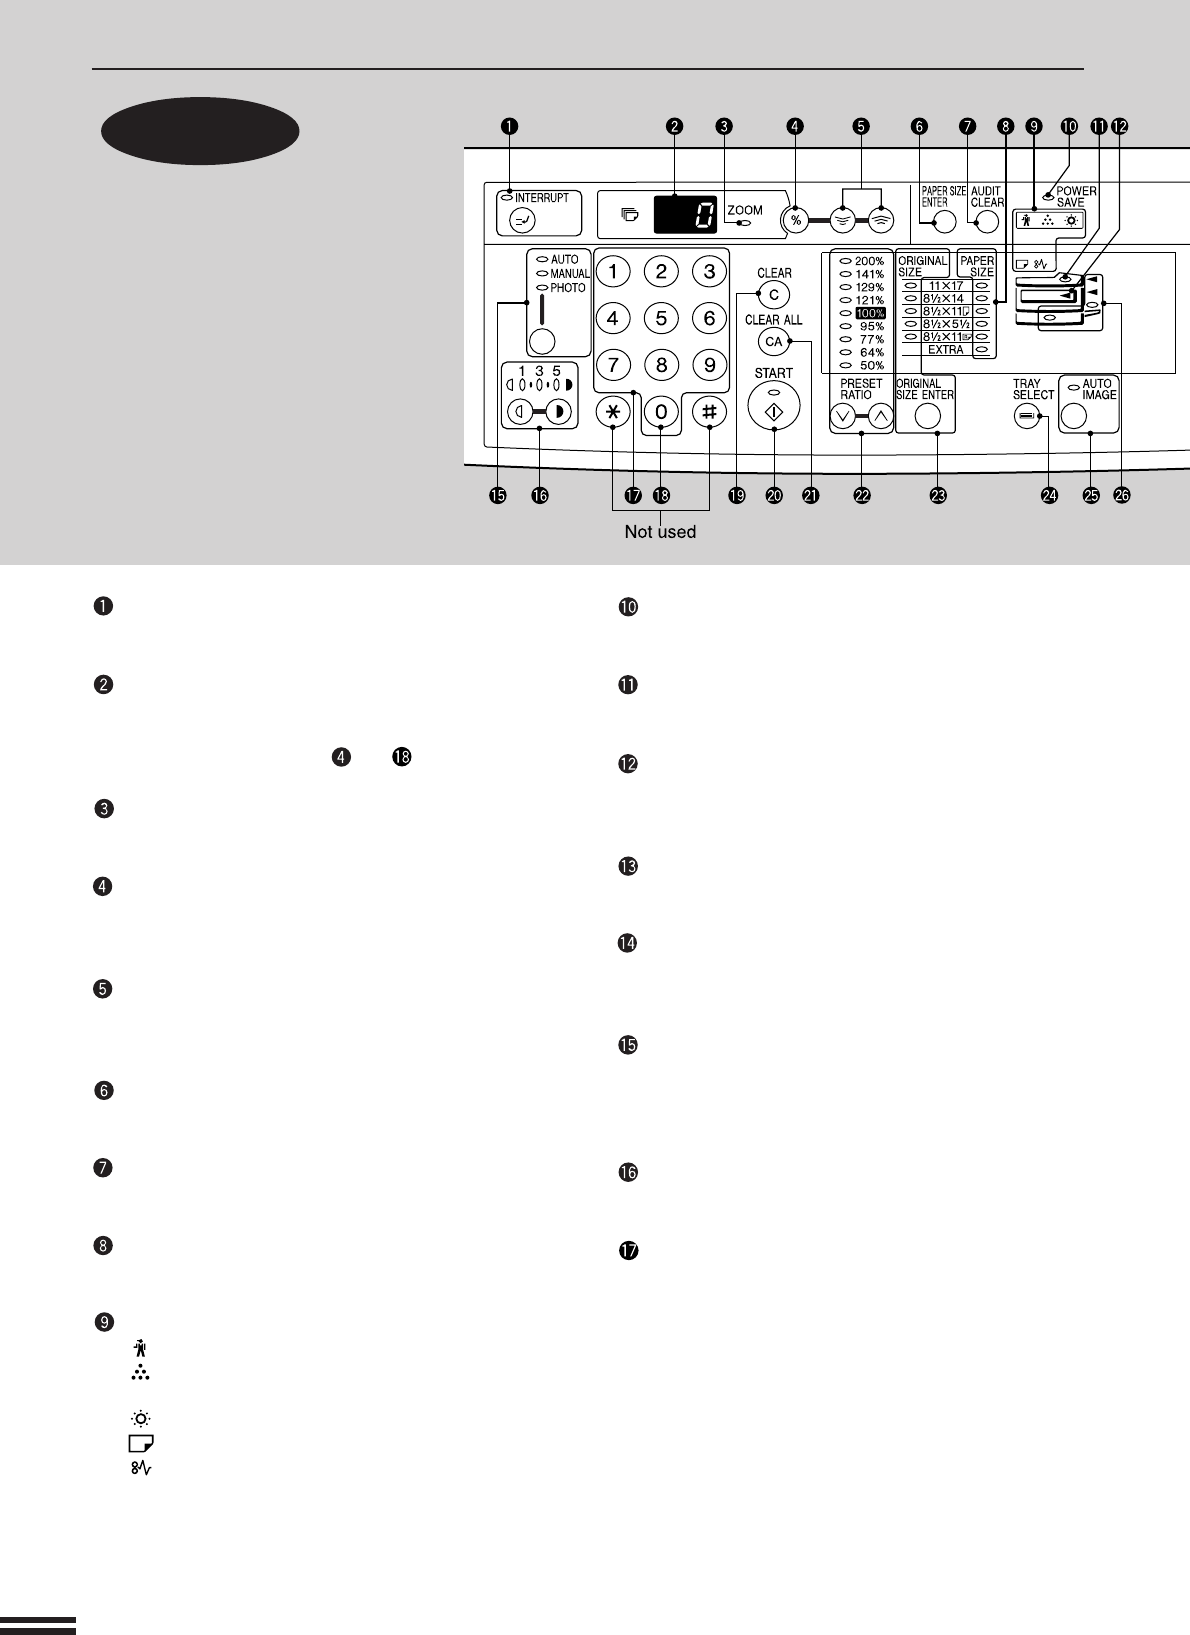
PART NAMES AND FUNCTIONS
INTERRUPT key and indicator (p. 25)
Interrupts a copy run.
Copy quantity display
Displays the specified copy quantity during the ready
condition and displays the copy countdown as copies
are made. Also see items and .
ZOOM indicator (p.17)
Lights up when a zoom ratio is set.
Copy ratio display key (p. 17)
Press and hold down during standby to display the copy
ratio in the copy quantity display.
Zoom keys (p. 17)
Use to select any reduction or enlargement copy ratio
from 50% to 200% in 1% increments.
PAPER SIZE ENTER key (p.12)
Use to set the paper size in a paper tray.
AUDIT CLEAR key (p.13)
Closes an open account.
PAPER SIZE indicators
Light up to show the selected copy paper size.
Alarm indicators
: Maintenance indicator (p.34)
: Toner cartridge replacement required indicator
(p.28)
: Developer replacement required indicator (p.34)
: Paper required indicator (p.10)
: Misfeed indicator (p.30)
POWER SAVE indicator (p. 42)
Lights up when the copier is in a power save mode.
SPF indicator (p. 55)
Lights up when originals are set in the optional SPF.
Output tray full indicator
Indicates copies must be removed from the paper output
tray.
B/W REVERSE key and indicator (p. 23)
Press to reverse the black and white areas.
XY-ZOOM key and indicator (p. 21)
Press to change the horizontal and vertical copy ratios
independently.
AUTO/MANUAL/PHOTO key and indicators
(p. 14)
Use to sequentially select the exposure modes: AUTO,
MANUAL, or PHOTO.
Light and dark keys and indicators (p. 15)
Use to adjust the MANUAL or PHOTO exposure level.
Numeric keys
Use to select the desired copy quantity or to make user
program entries.
GETTING STARTED
Part names and functions


