


3-43
PRINTER
Contents
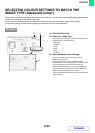
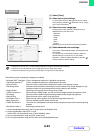
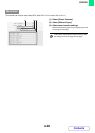
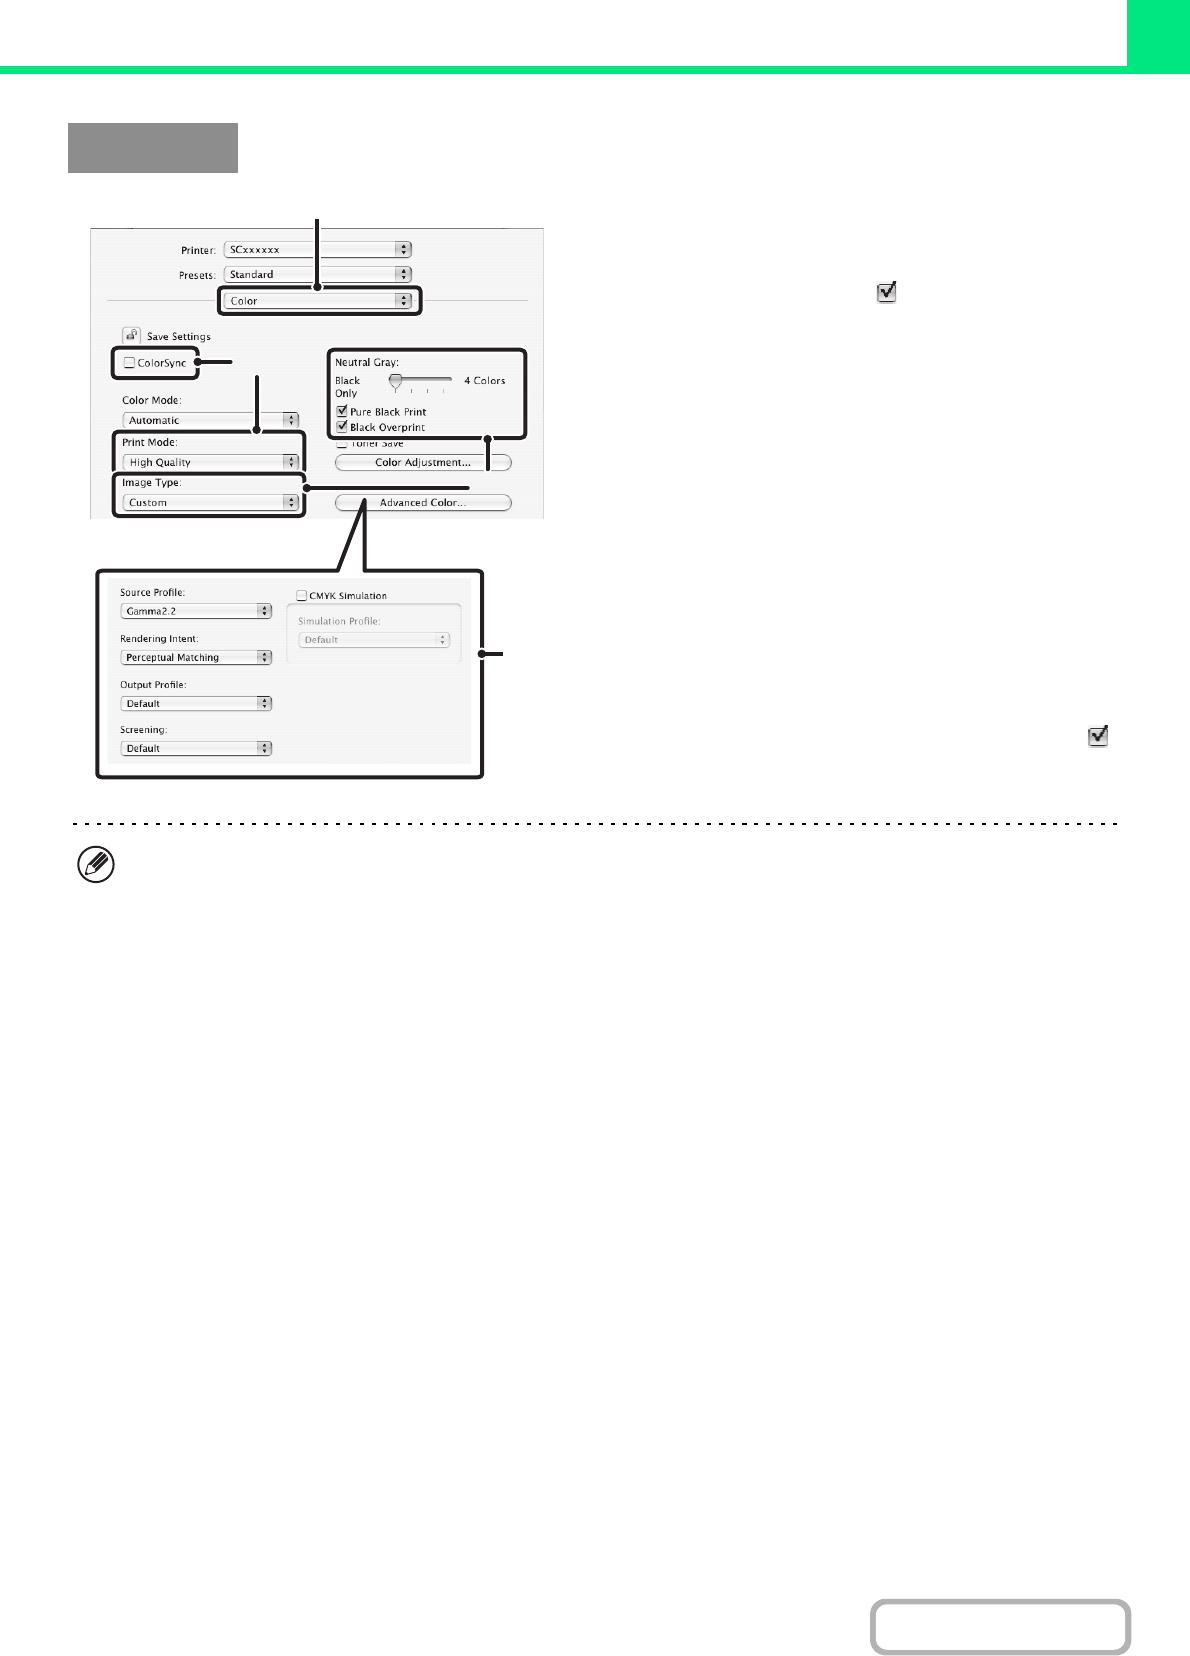
(1) Select [Color].
(2) Select colour print settings.
To use the Mac OS Color Management function, select
the [ColorSync] checkbox . When this is done, "Image
Type" cannot be selected.
(3) Select the colour image type.
A image type to match the data to be printed can be
selected from the pull-down menu.
• Standard
• Graphics
•Photo
•CAD
• Scan
•Custom
[Neutral Gray] can be used when [Custom] is selected.
(4) Select advanced colour settings.
If you wish to select detailed settings, click the [Advanced
Color] button.
To configure colour management settings, select the
desired settings from the menus. To use "CMYK
Simulation", select the [CMYK Simulation] checkbox
and then select the desired setting.
The following colour management settings are available.
• Windows ICM*
1
checkbox: Colour management method in a Windows environment
• ColorSync checkbox*
2
: Colour management method in a Macintosh environment
• Source Profile: Select the colour profile used to display the image on the computer screen.
• Rendering Intent: Standard value used when converting the colour balance of the image displayed on the
computer screen to a colour balance that can be printed by the machine.
• Output Profile: Selecting a colour profile for the image to be printed
• CMYK Correction*
3
: When printing a CMYK image, you can correct the image to obtain the optimum result.
• Screening: Select the most suitable image processing method for the image being printed.
• Neutral Gray: Select the toner colour used to print grey areas.
• Pure Black Print*
4
: Black text and vector graphics can be printed using black toner only.
• Black Overprint*
4
: Prevents whitening of the outline of black text.
• CMYK Simulation*
4
: The colour can be adjusted to simulate printing using the process colours used by printing
presses.
• Simulation Profile*
4
: Selecting a process colour
*1 Cannot be selected when using the PS printer driver on Windows Vista.
*2 Cannot be selected in Mac OS X v10.2.8.
In Mac OS 9, can be selected in the "Colour Matching" menu.
*3 Can only be used when using the PCL6 printer driver.
*4 Can only be used when using the PS printer driver (Windows/Macintosh).
Macintosh
(3)
(2)
(1)
(4)
• In Mac OS X v10.5 to 10.5.1, click the [Advanced] tab to configure advanced colour settings.
• In Mac OS X v10.2.8, select the colour image type from the "Image Type" menu.
• In Mac OS 9, select [Color], [Color2], and [Color3] to configure colour print settings.