


37
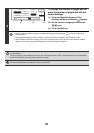
Specifying the size by entering numerical values.
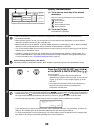
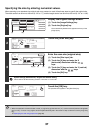
When scanning a non-standard size original such as a postcard or card, follow these steps to specify the original size.
The width can be from 64 mm to 432 mm (2-1/2" to 17"), and the length can be from 64 mm to 297 mm (2-1/2" to 11-5/8").
1
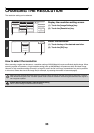
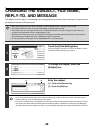
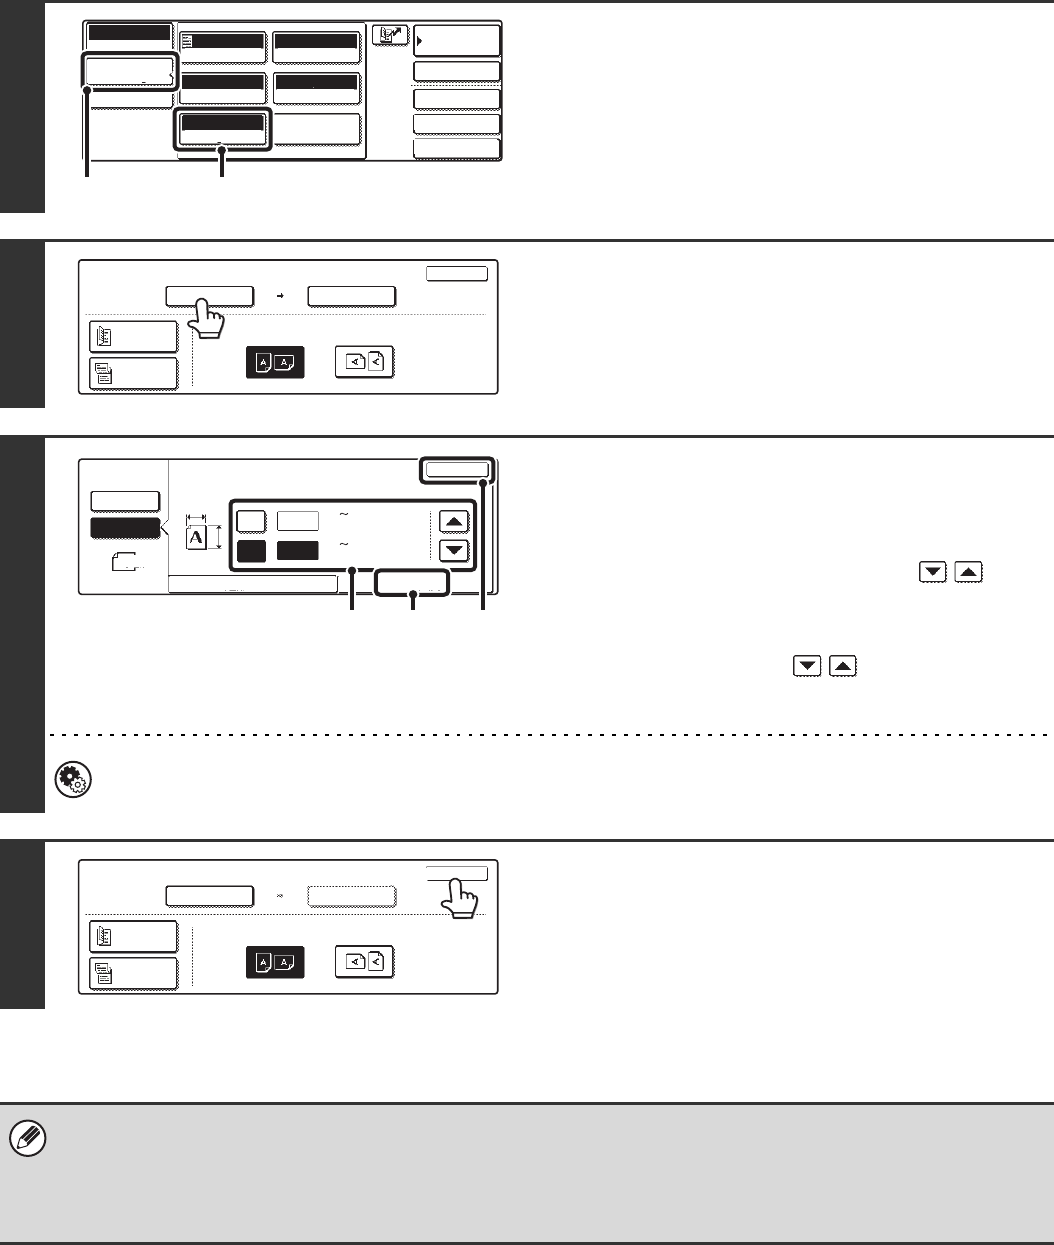
Display the original settings screen.
(1) Touch the [Image Settings] key.
(2) Touch the [Original] key.
The automatically detected size appears at the top of the
[Original] key.
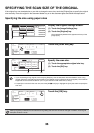
2
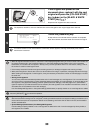
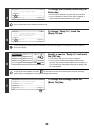
Touch the [Scan Size] key.
3
Enter the scan size (original size).
(1) Touch the [Size Input] tab.
(2) Touch the [X] key and enter the X
(horizontal) dimension with the
keys.
(3) Touch the [Y] key and enter the Y (vertical)
dimension with the keys.
(4) Touch the [OK] key.
System Settings (Administrator): Original Size Detector Setting
This is used to set the size entry screen to "mm units" or "inch units".
4
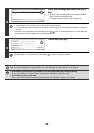
Touch the [OK] key.
The specified size appears in the [Scan Size] key.
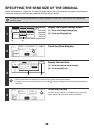
• When the scan size is specified by numerical values, the send size cannot be specified.
• When the automatic document feeder is used, an original longer that 432 mm (17") can be scanned (maximum length 800
mm (31-1/2")). To scan a long original, touch the [Standard Size] tab in the screen of step 3 and then touch the [Long Size]
key.
☞ Specifying the size using paper sizes (page 36)
Quick File
File
Special Modes
Address Entry
Address Book
Scan
Mode Switch
Image
Settings
Send Settings
Auto
Exposure
200X200dpi
Resolution
PDF/PDF
File Format
Special Modes
Original
Auto A4
Mono2/Auto
Colour Mode
(1) (2)
Scan
Original
100%
OK
Scan Size
Auto A4
2-Sided
Booklet
2-Sided
Tablet
Send Size
Auto
Image Orientation
Scan
Original
64
64
OK
Size Input
Standard Size
(64 432)
mm
(64 297)
mm
X
Y
Auto
Manual
Manual
X
Y
(4)(2), (3) (1)
Scan
Original
2-Sided
Booklet
2-Sided
Tablet
OK
Scan Size
Send Size
Auto
Image Orientation
X64 Y64