


Scan to E-mail Transmission
23
2. Scan to
E-mail
4
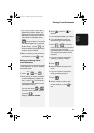
If you need to select or change any
of the e-mail options, press
and follow Steps
5 and 6 below. (Note that settings
selected here are temporary. To
make permanent changes, see p.
17.)
If you do not wish to change the e-
mail options, go directly to Step 7.
• To exit the e-mail options, press
and go to Step 7.
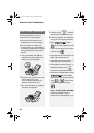
5
Press or until the
desired option appears, and press
( is not necessary for the
FILE FORMAT setting). Change the
option as explained below (use the
letter keys to enter text and
to delete text; p. 6).
• E-MAIL SUBJECT: Enter a subject
(max. 128 characters). When
finished, press .
• E-MAIL MESSAGE: Enter a
message (max. 256 characters).
When finished, press .
• FILE FORMAT: Press for TIFF
or for PDF. (Make sure the
recipient has an image viewer that
can show images in the selected
format.)
• FILE NAME: Enter a name for the
scanned file (max. 40 characters).
When finished, press .
(If a file name is not entered, the
name “UXB800-yymmddhhmmss”,
where “yymmddhhmmss” is the year,
month, day, hour, minute, and
second the file was created, is
automatically assigned.)
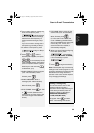
6
When you have finished configuring
the e-mail options, press
. (If the display
shows [PRESS START TO SCAN],
it is not necessary to press
.)
7
Press to begin transmission.
Note: The recipient may have security
settings in their e-mail program or virus
protection software that prevent the file
attachment from being received or
opened. In this case, ask the recipient
to try changing the settings.
Sending a message only
You can also send a short e-mail
message without including a
document. Perform Steps 3 through 7
of the above procedure (enter the
message in Step 5). After Step 7,
[SEND W/O DOCUMENT?] /
[1=YES,2=NO,W/T DOC.]
will appear. Press to select
“YES”. The message will be sent.
all.book Page 23 Thursday, August 10, 2006 2:22 PM