


73
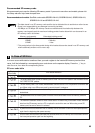
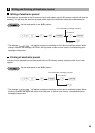
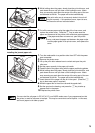
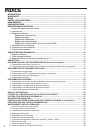
6. While holding down the paper, slowly close the print roller arm, and
push down the arm until you hear a click locking the arm. Make
sure you securely push down the center of the wing part of the arm
as illustrated at the left. The paper will be fed automatically.
If the print roller arm is not securely locked, the unit will
not print correctly. If this problem occurs, open the arm,
and close the arm as instructed above.
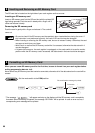
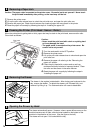
7. Cut off the excess paper using the edge of the inner cover, and
replace the printer cover. Press the
F
key to make sure the
paper end comes out of the printer cover and clean paper appears.
If the paper end does not come out, open the printer
cover, and pass the paper end between the paper cutter
and the paper guide of the printer cover, and replace the
cover.
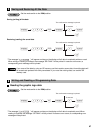
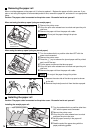
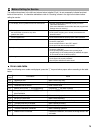
Installing the journal paper roll:
1. Turn the mode switch to a position other than OFF with the power
cord connected.
2. Remove the printer cover.
3. Lift up the print roller release lever to unlock and open the print
roller arm.
4. Set the paper correctly in the paper roll cradle.
5. Feed the end of the paper along with the paper positioning guides.
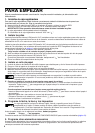
6. While holding down the paper, slowly close the print roller arm, and
push down the arm until you hear a click locking the arm. Make
sure securely you push down the center of the wing part of the arm
as illustrated at the left. The paper will be fed automatically.
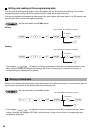
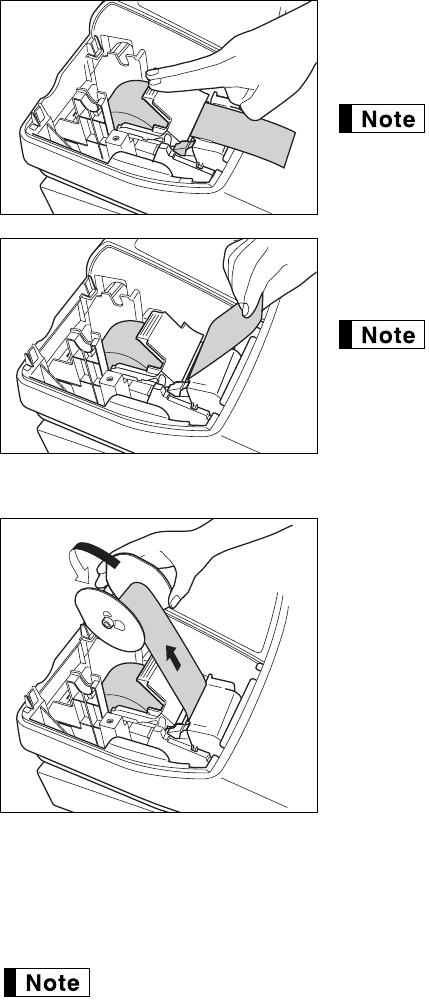
7. Insert the end of the paper into the slit in the spool. (Press the
F
key to feed more paper if required.)
8. Wind the paper two or three turns around the spool shaft.
9. Set the spool on the bearing, and press the
F
key to take up
excess slack in the paper.
10. Replace the printer cover.
You can wind the roll paper in OP X/Z, X1/Z1, and X2/Z2 modes even if you programmed so that
the printer is used for issuance of receipts. This may be convenient to wind reports. In this case,
set the roll paper to the take-up spool.