


-23
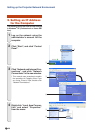
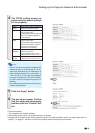
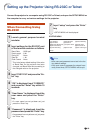
4 The TCP/IP setting screen ap-
pears, ready for network settings
for the projector.
Note
•Confirm the existing network’s segment (IP
address group) to avoid setting an IP ad-
dress that duplicates the IP addresses of
other network equipment or computers. If
“192.168.150.2” is not used in the network
having an IP address of “192.168.150.XXX”,
you don’t have to change the projector IP
address.
•For details about each setting, consult your
network administrator.
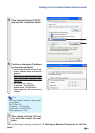
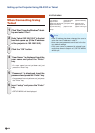
5 Click the “Apply” button.
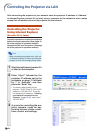
6 The set values appear. Confirm
that the values are set properly,
and then click the “Confirm” but-
ton.
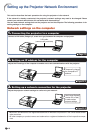
Setting up the Projector Network Environment
• Close the browser.
• This completes the network settings.
• After setting items, wait for 10 seconds and then re-access.
• Change the IP address of the setting computer back to its original address, which you have noted down in
Step 6-1 on page 21, and then connect the computer and the projector to the network.
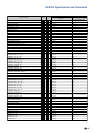
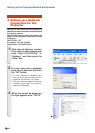
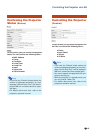
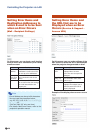
Setting example / Remarks
Select “ON” or “OFF” to determine
whether to use DHCP
Client
.
You can set this item when “DHCP
Client
” is set to “OFF”.
Factory default setting: 192.168.150.2
Enter an IP address appropriate
for the network.
You can set this item when “DHCP
Client
” is set to “OFF”.
Factory default setting: 255.255.255.0
Set the subnet mask to the same
as that of the computer and
equipment on the network.
You can set this item when “DHCP
Client
” is set to “OFF”.
Factory default setting: 0.0.0.0
* When not in use, set to “0.0.0.0”.
Factory default setting: 0.0.0.0
* When not in use, set to “0.0.0.0”.
Items
DHCP
Client
IP Address
Subnet
Mask
Default
Gateway
DNS
Server