E-15
Setup & Connections
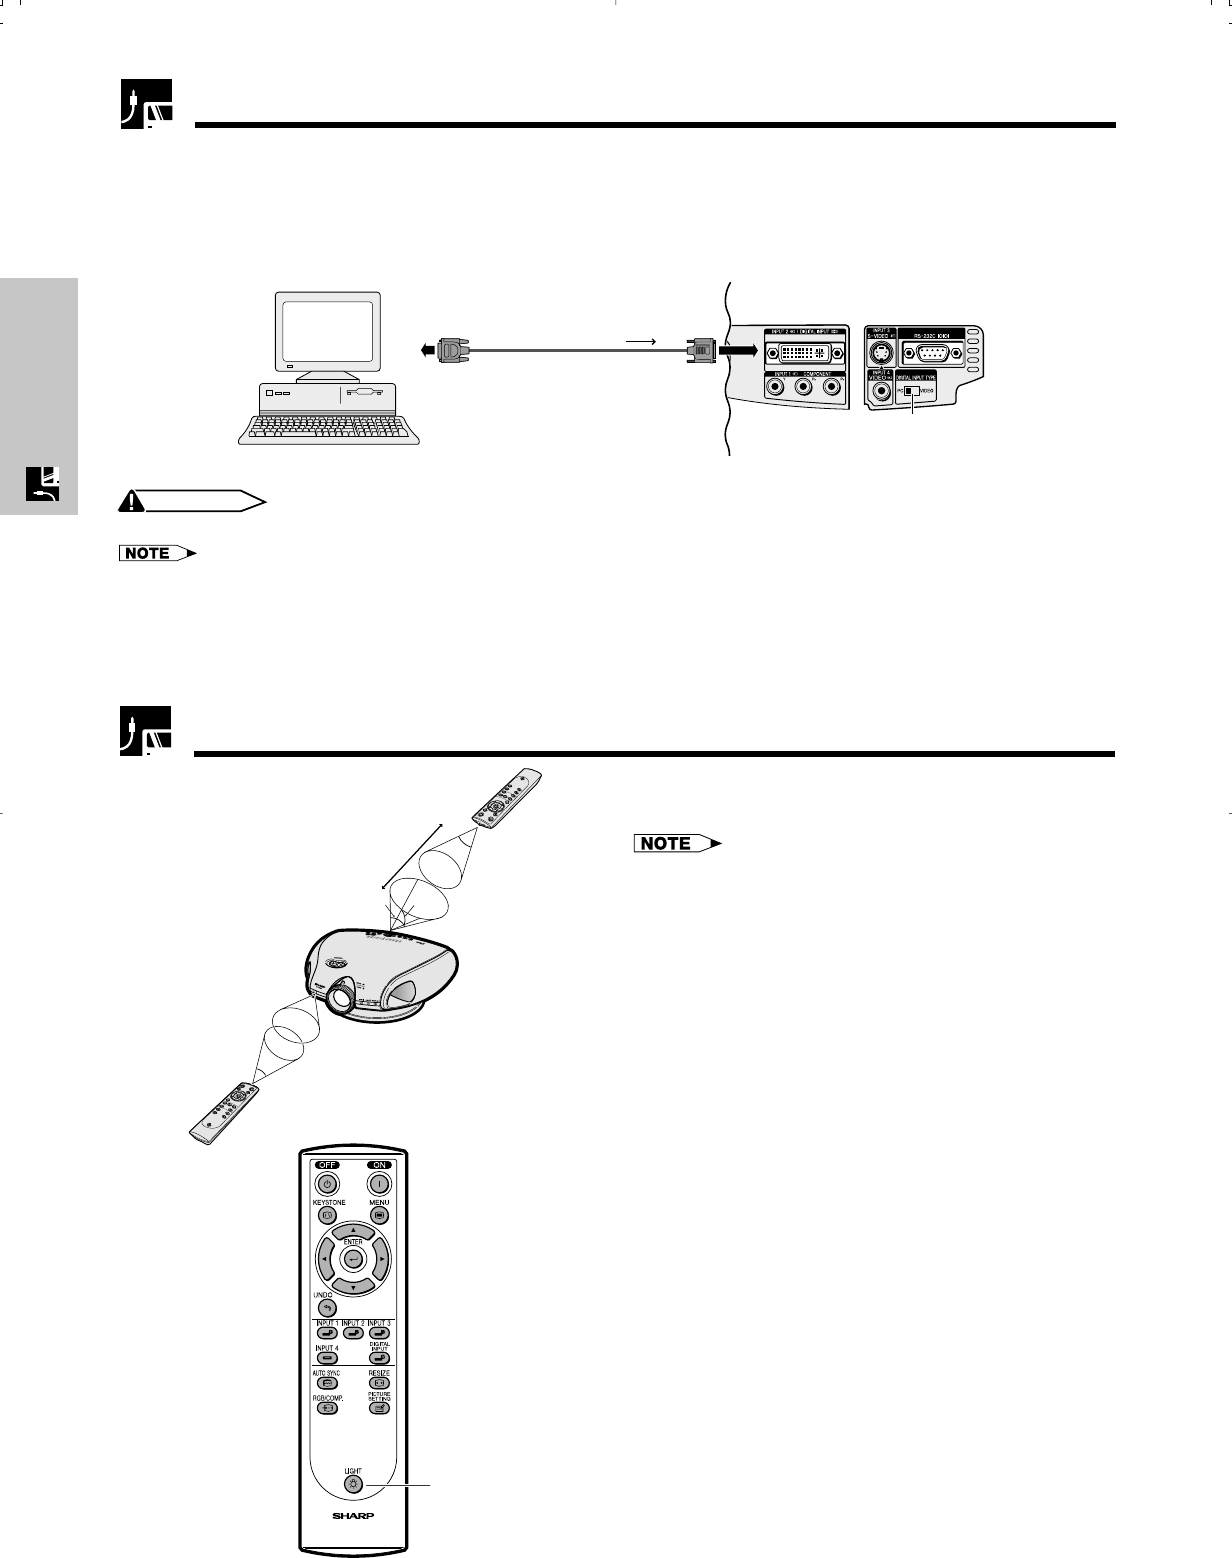
Operating the Remote Control
The remote control can be used to control the projec-
tor within the range shown on the left.
• The signal from the remote control can be reflected off a
screen for easy operation. However, the effective distance
of the signal may differ due to the screen material.
Remote Control
Remote Control
45˚
23Ј (7 m)
30˚
30˚
45˚
30˚
Using the remote control in a dark
room
The backlights of the operation buttons can be turned
on for five seconds and off by pressing LIGHT. If you
want to turn off the backlights while they are on, press
LIGHT again.
LIGHT button
Connecting a computer with DIGITAL RGB output
1 Slide the “DIGITAL INPUT TYPE” switch on the back terminal board to “PC”.
2 Connect one of the DVI cable (commercially available) to the DIGITAL INPUT port on the projector.
3 Connect the other end to the Corresponding terminal on a computer.
• Make sure to turn both the projector and the video equipment off, before switching the “DIGITAL INPUT TYPE”
swich and connecting.
Connect an RS-232C cable (null modem, cross type, commercially available) to the serial port on the computer.
CAUTION
• Do not connect or disconnect an RS-232C cable to or from the computer while it is on. This may damage your computer.
• Refer to “Computer Compatibility Chart” on page 54 for a list of computer signals compatible with the projector. Use with computer
signals other than those listed may cause some of the functions not to work.
• The RS-232C function may not operate if your computer port is not correctly set up. Please refer to the operation manual of the computer for
details.
• The arrows (→, ↔) in the configuration above indicate the direction of the signals.
• A Macintosh adaptor may be required for use with some Macintosh computers. Contact your nearest Authorized SharpVision Service Center
or Dealer.
23
1
Connecting to a Computer
DVI cable
(commercially available)
XVZ90U(E)#p15_21.p65 20/8/02, 7:21 pm15
