


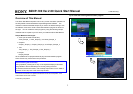

Supplement-1 - Capturing DV Video
Note: These operations are not necessary to create the demonstration program
shown at the beginning.
If you have a DV VCR or camcoder, you can use video recorded on a tape as
video material. The following procedure captures DV video and creates an
AVI file, so you can convert it into NSP format using the same procedure shown
in “Preparing Video Material” (page 5).
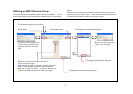
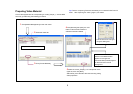
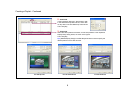
Captured AVI files are
shown here in the
Convert Material
window.
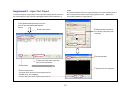
Click [Browse], then
select the folder
specified in step 3, if
necessary
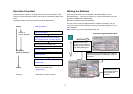
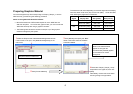
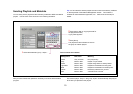
1 Connect the VCR and PC using an
i.LINK cable, power the VCR on, and
insert the desired DV cassette.
2 Click [Capture] on the main menu.
3 Click [Folder], then select the folder in
which the AVI files should be stored.
[Live REC] is for live recording.
Clicking this button immediately starts capturing.
It stops when you click [Stop].
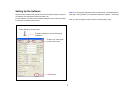
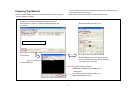
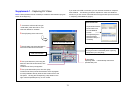
4 Cue up the desired In point using the
buttons of the VCR control section, then
click [In].
The time code of the point appears.
6 Click [REC].
Capturing starts. It automatically ends at the
specified Out point.
You can check the video here.
VCR control section
5 Cue up the desired Out point, then click [Out].
The time code of the point and the duration of the clip appear.
It is also possible to directly enter the time codes of the In and
Out points. Clicking the corresponding cueup button on the
right cues the specified point up, in such a case.
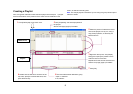
Upon Conversion
11