


13
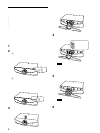
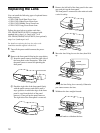
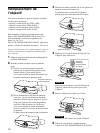
6 Remove the lens hole cover of VPL-FE40L/
FX40L/FX41L/FW41L.
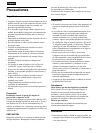
7 Remove two lens caps and the lens connector
cover from the replacment lens.
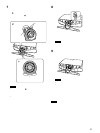
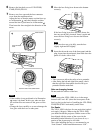
Adjust the lens so that the motor section faces up
as in illustration
, and check that the cushion
around the lens is positioned as in illustration
.
Then insert the lens straight in the direction of the
arrow.
Notes
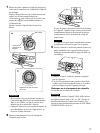
• If the cushion is not positioned as in illustration
, rotate it by hand. In this case, take care that
the cushion does not come off the groove of the
lens.
• Change the lens carefully so as not to damage the
lens glass with the lever or other parts.
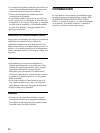
8 Move the lens fixing lever down to the bottom
correctly.
If the lens fixing lever does not move down, the
lens may not be fully inserted. Insert it again and
move the lens fixing lever down to the bottom
correctly.
Note
If the lens does not go in fully, turn the lens
slightly right and left slightly.
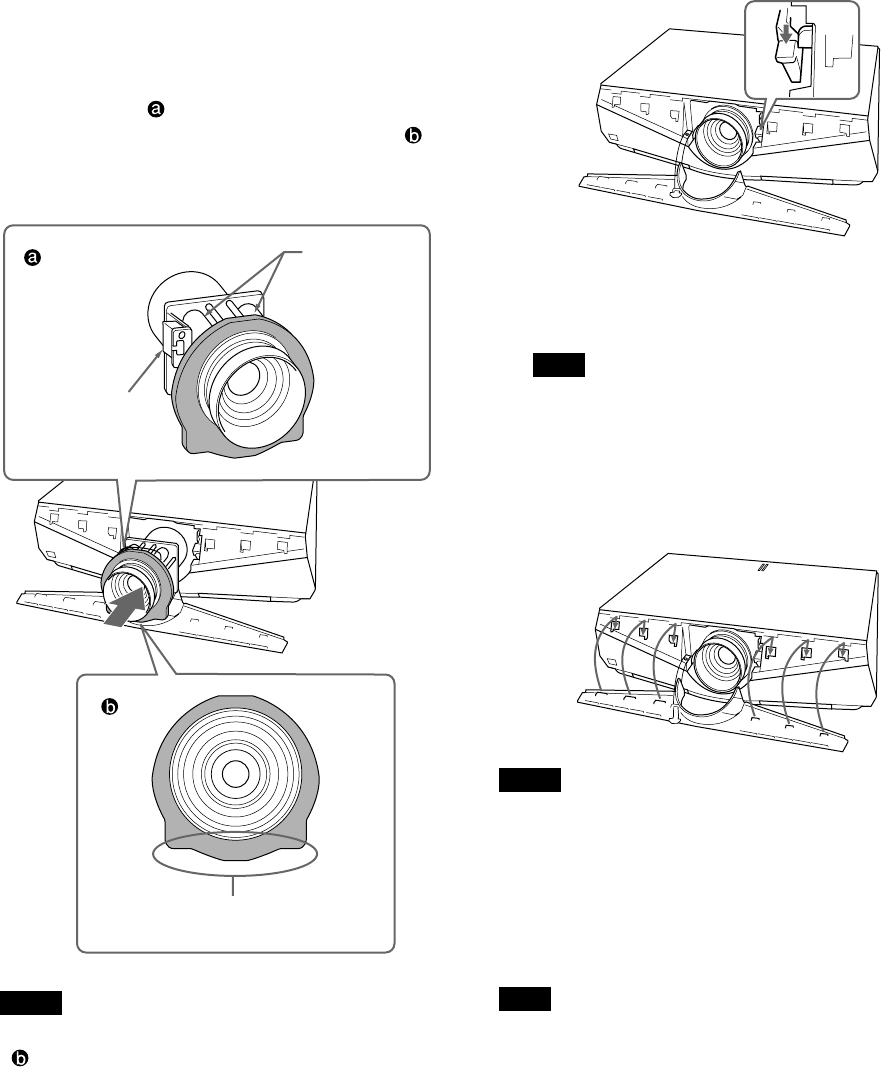
9 Insert the tab on the rear of the front panel and the
plug-in part into the main unit, then hold down the
panel so it locks with a click.
Notes
• Take care not to allow the safety wire to protrude.
• After fitting the left and right front panels, check
that the top of the front panel does not lift up or
protrude from the main unit.
Note on changing lenses
Do not touch the surface of the lens.
Note
When you use the VPLL-1008, do so in the range
between +90° and –90° (when the lower parts of the
lens is a plus) on the basis of installing the VPL-FE40/
FX40/FX41/FW41 horizontally on the floor.
For Dealer
The VPLL-1008 is the lens for rear projection (optical
axis angle: 0 degree). When using the VPLL-1008,
you should install the projector with the center of the
lens aligned with the center of the screen in the
horizontal/vertical direction. If you do not do so, a
portion of the picture may be invisible.
Also, after installing the lens, we recommend to set
“Lens Control” in the Installation menu to “Off”.
Lens connector
cover
Motor section
Face this side of the cushion down.