


Installing the Driver & Software
16
STEP2
Windows
®
USB
Windows
®
1
For USB Interface Users
(For Windows
®
98/98SE/Me/2000 Professional/XP/XP Professional
x64 Edition)
Important
Make sure that you have finished the
instructions from Step 1 Setting Up the
Machine on pages 4 through 13.
Note
• Uninstall any other version of MFC software, any
scanning and faxing software and any GDI printer
drivers as they might cause conflicts with new
software.
• Please close any applications running before
installing MFL-Pro Suite.
• Make sure there are no memory cards in the
media drive of the machine.
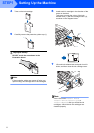
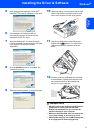
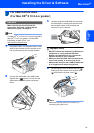
1 Disconnect the machine from the power socket
and from your computer, if you already
connected an interface cable.
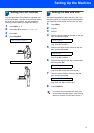
2 Turn on your PC.
(For Windows
®
2000 Professional/XP/
XP Professional x64 Edition, you must be
logged on with Administrator rights.)
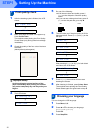
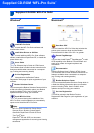
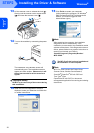
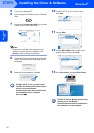
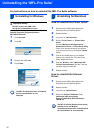
3 Put the supplied CD-ROM into your CD-ROM
drive. If the model name screen appears,
choose your machine. If the language screen
appears, choose your language.
4 The CD-ROM main menu will appear. Click
Install MFL-Pro Suite.
Note
• If this window does not appear, use Windows
®
Explorer to run the setup.exe program from the
root folder of the Brother CD-ROM.
• If you are using Windows
®
2000 Professional
and have not installed service pack 3 (SP3) or
greater:
To access the PhotoCapture Center™ features
from your computer you may have to install a
Windows
®
2000 update first.
The Windows
®
2000 update is included with the
MFL-Pro Suite installer.
To install the update, follow the steps below:
1Click OK to start installation of the Windows
®
updates.
2 When instructed, click OK to restart your
computer.
3 After the computer restarts, the installation of
MFL-Pro Suite will automatically continue.
If the installation does not continue automatically,
open the main menu again by ejecting and then
reinserting the CD-ROM disc or double-click the
setup.exe program from the root folder, and
continue from Step 4 to install MFL-Pro Suite.