51
Using the Menus
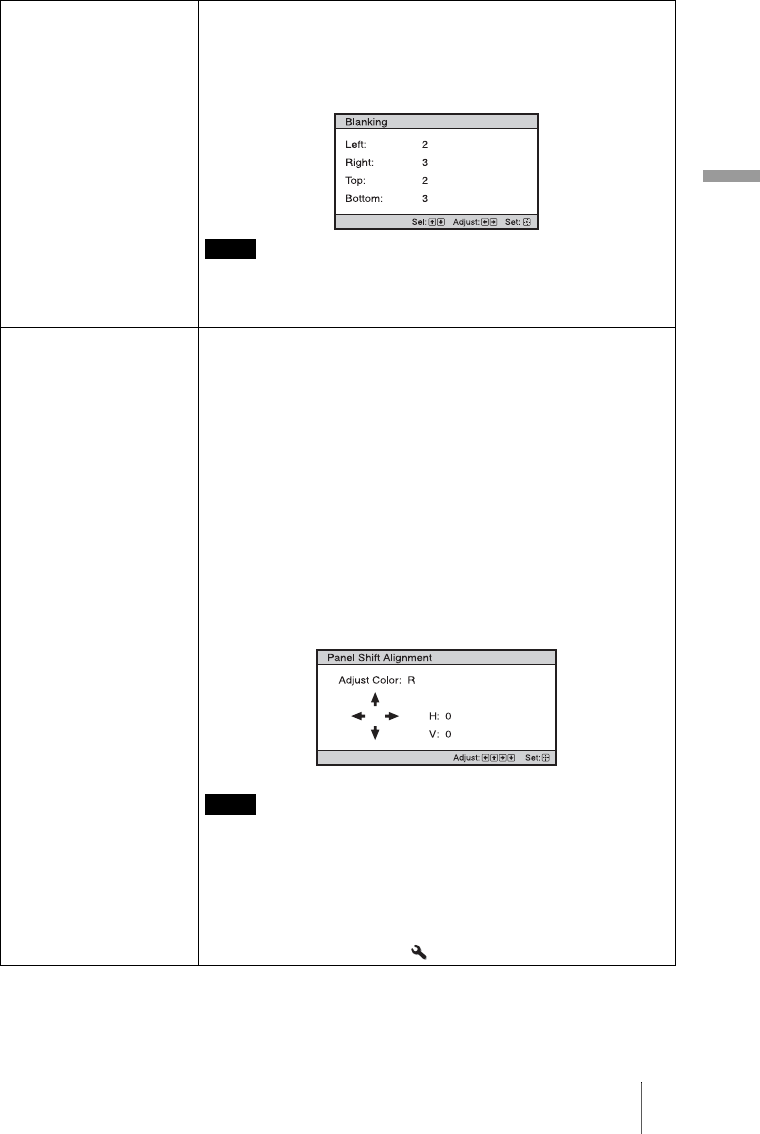
Blanking This feature allows you to adjust the displayable region within
the four directions of the screen.
Select each screen edge “left / right / top / bottom” on the Blanking
adjustment screen with M / m buttons. Adjust the desired Blanking
value with < / , button.
When both the “Blanking” and the “V Keystone” are adjusted at the
same time, the “Blanking” cannot be adjusted correctly. When using
the “Blanking”, make sure that you set the “V Keystone” to “0”.
Panel Alignment This feature allows you to adjust the gaps in the color of
characters or the picture.
When set to “On”, the “Adjust Color” and the “Pattern Color” can be
assigned and adjusted.
Adjust Color: Assigns the desired color to adjust the gaps in color.
Select “R” (Red) or “B” (Blue) to make adjustments based on “G”
(Green).
Pattern Color: Select “R/G” (Red and Green) or “R/G/B” (White,
all colors) when the “Adjust Color” is “R” (Red). Select “B/G”
(Blue and Green) or “R/G/B” (White, all colors) only when the
“Adjust Color” is “B” (Blue).
Adjust: Assign the settings of the horizontal direction (H) with
< / , buttons and the vertical direction (V) with M / m buttons
on the Shift Adjust screen. The colors selected in the “Adjust
Color” can be adjusted with the < / ,, M / m buttons in each
direction.
Reset: Returns to the factory settings.
Depending on the adjustments made above, the number of display
pixel may decrease. Also, colors may become uneven or the
resolution may change.
Tip
If colors appear on the edge of the screen after making the
adjustments above, adjust the region of the picture to display with
“Blanking” in the Installation menu. (1 page 51)
Note
Note


