


SY-6IZA/6IZA-NA Quick Start Guide
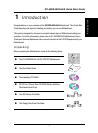
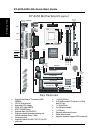
10
Hardware
Installation
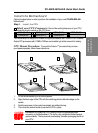
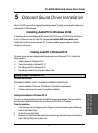
Step 6. Enable/Disable Power-On by Keyboard (JP1)
You can choose to enable the Power-On by Keyboard function by shorting pin 2-3 on jumper
JP1; otherwise, short pin 1-2 to disable this function.
Power-On by
Keyboard
Disable Enable
JP1 Setting
Short pin 1-2 to the disable
Power-On by Keyboard
function.
Short pin 2-3 to enable the
Power-On by Keyboard
function
Important: When using the Power-On by Keyboard function, please make sure the
ATX power supply can take at least 720mA load on the 5V Standby lead (5VSB) to
meet the standard ATX specification.
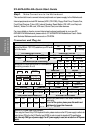
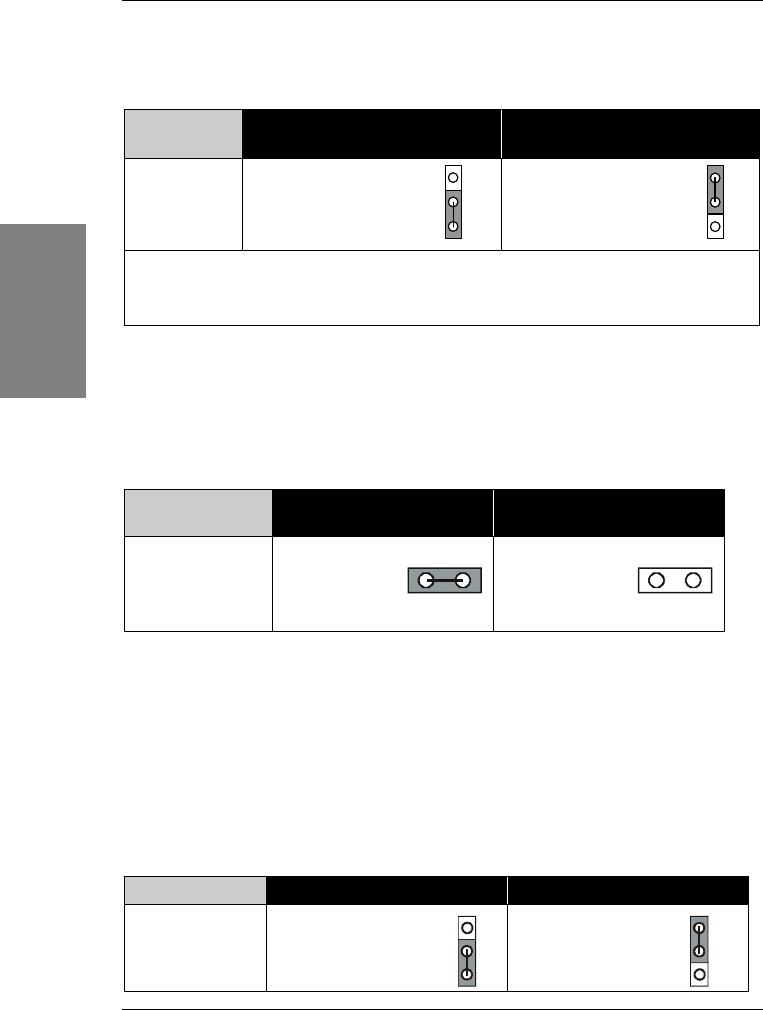
Step 7. Power Button Enable (JP8)
Your system can be power on by either pressing a power button or typing in a password,
which can be set in the BIOS SOYO COMBO Setup. To avoid being unable to power up the
system due to of forgetting the password, you can place a jumper cap to short JP8. This will
always enable the Power Button.
Power Button
Enable
Power Button always
enabled
Power Button according to
BIOS setting
JP8 Setting
Short pin to always
enable the Power
Button.
Open pin for a Power
Button function
according to the BIOS
setting.
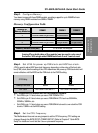
Step 8. Enable/Disable Onboard Sound (JP7) (for SY-6IZA only)
The onboard audio features of your Motherboard are controlled by jumper JP7.You can
choose to enable or disable the available sound function by setting JP7 accordingly.
l
Short pin 1-2 on jumper JP7 to enable the onboard sound function. Then, you can plug
your external audio devices such as amplified-speakers, CD-player, and microphone
to the Motherboard Line-out, Line-in and Mic ports right after the Motherboard is
installed. (You do not need to install any sound card.)
l
To disable the onboard sound options short pin 2-3 on jumper JP7.
Onboard Sound Enable Disable
JP7 Setting
Short pin 1-2 to
enable the onboard
sound function.
Short pin 2-3 to
disable the onboard
sound function.
3
2
1
3
2
1
2
1
3
2
1
3