


18 SunATM 3U CompactPCI Adapter Installation and User’s Guide • February 2001
Attaching the Adapter to the System
After installing the adapter, you must make the system recognize the new adapter
and its interfaces. The procedure you use for attaching the adapter to the system
depends on whether you installed the adapter in a hot swap or cold environment.
If you performed a hot installation, see “To Attach the Adapter in a Hot Swap
Environment” on page 18. If you powered down the system before installing the
card, see “To Power On the System After a Cold Installation” on page 19.
Note – After attaching the adapter to the system, see Chapter 4 for the software
configuration instructions.
▼ To Attach the Adapter in a Hot Swap
Environment
1. Follow the hot swap procedures for attaching an I/O card to the system in the
system’s documentation.
Refer to the system’s server or hardware installation manual for the attachment
procedure specific to your system.
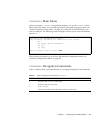
2. On some systems, for example, you would log into the system console as
superuser and identify the board slot number (attachment point).
3. At the system console, activate the adapter with the cfgadm -c connect
command:
Where ap_id is the attachment point ID.
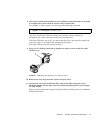
4. Check the hot swap LED on the adapter.
■ If the adapter was installed correctly, the blue LED should be off.
■ If the hot swap LED remains on (lit), the adapter was not installed correctly.
Remove and reinstall the adapter to make sure it is seated correctly in the slot.
# cfgadm -s select=class(pci)
# cfgadm -c connect ap_id