


7
Upgrading a Phaser¨ 200e, 200i or 220e printer to a Phaser¨ 240
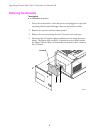
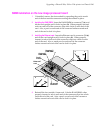
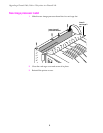
4.
Connect the I/O boardÕs ribbon cable to the image processor boardÕs
I/O connector. Tilt the I/O board forward into place against the rear
of the printerÕs card cage. Secure the I/O board in place with the two
thumbscrews.
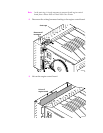
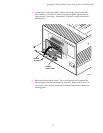
5.
Reconnect the interface cables. Turn on the printer and examine the
startup page it should automatically print out. Refer to the
Phaser 240
Color Printer User Manual
for details on connecting interface cables and
making prints.
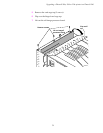
Install
I/O board
Install
ribbon cable
31865-06