


7-2
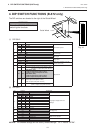
7. LOADING THE RIBBON
EO1-33015
7. LOADING THE RIBBON
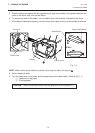
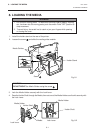
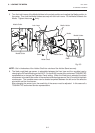
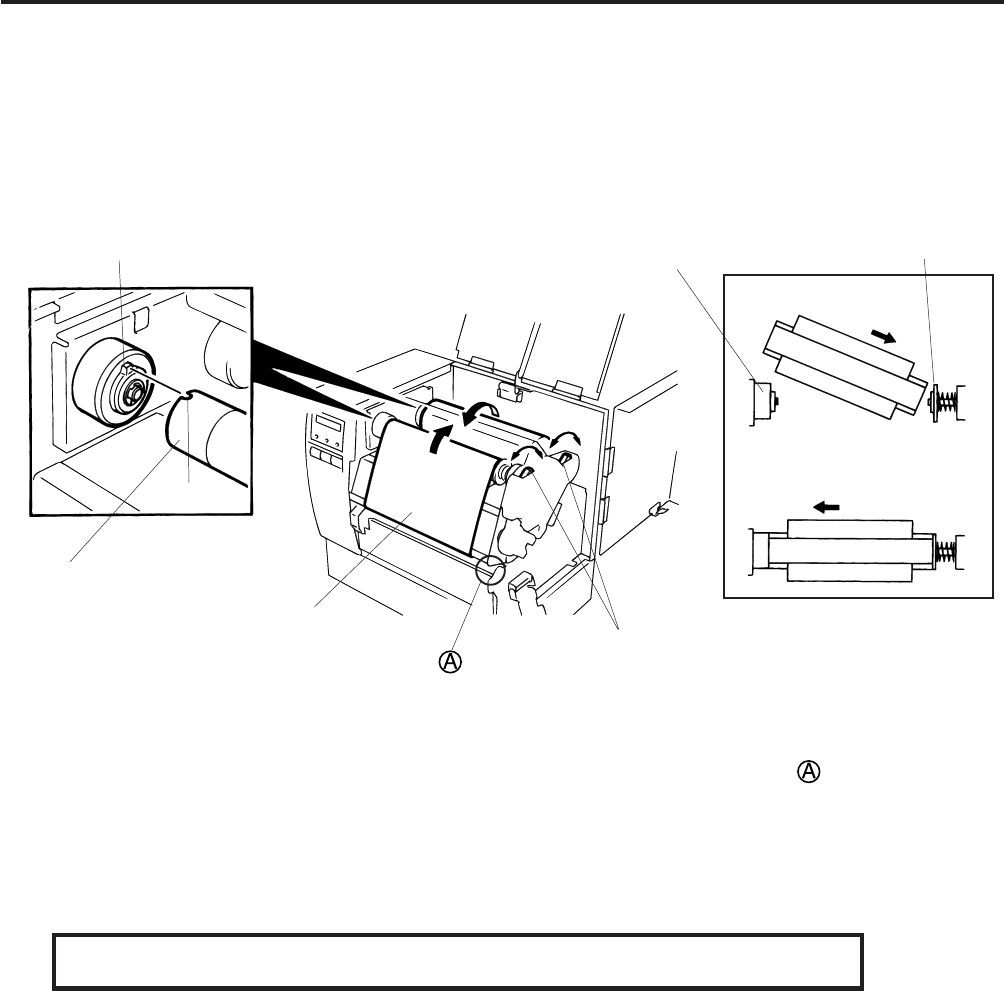
5. Push the ribbon core against the spring guide wheel, align the protrusion of the guide wheel with the
notch of the ribbon core, then set the ribbon.
6. To remove the slack of the ribbon, turn the ribbon core in the direction indicated by the arrow.
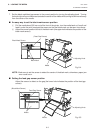
7. If the ribbon wrinkles while printing, move the ribbon levers back or forth until the wrinkle is removed.
Protrusion
Ribbon Core
Notch
Ribbon
Ribbon Lever
STEP 1
STEP 2
Spring Guide Wheel
Guide Wheel
Fig. 7-3
NOTE: When removing the ribbon, be careful not to snag the ribbon on the part .
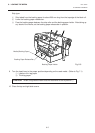
8. Set the head lock plate.
9. Turn the head lever to the proper position depending on the used media. (Refer to Fig. 7-1)
1: Labels or thin tag paper
2: Thick tag paper
CAUTION: When using labels ensure that the head lever is set to position
1
.