


5-15
1
2
3
4
5
6
7
9
10
11
12
8
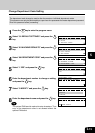
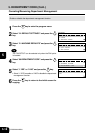
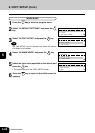
Change Department Code Setting
1
Press the key to enter the program menu.
2
Select “01.DEFAULT SETTINGS” and press the
key.
3
Select “01.MACHINE DEFAULTS” and press the
key.
PROGRAM
01.DEFAULT SETTINGS
02.LISTS
03.INITIAL SETUP
DEFAULT SETTINGS
01.MACHINE DEFAULTS
02.COPY SETUP
03.FAX SETUP
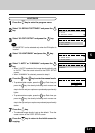
MACHINE DEFAULTS
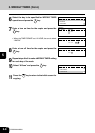
04.WEEKLY TIMER
05.SPEAKER VOLUME
06.DEPARTMENT CODE
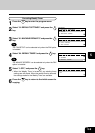
4
Select “06.DEPARTMENT CODE” and press the
key.
5
Select “1.YES” and press the key.
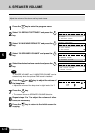
DEPARTMENT CODE
ENTER DEPARTMENT NUMBER(1-99):
07
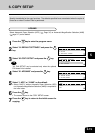
6
Enter the department number to change a setting,
and press the key.
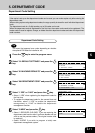
The department code change is used to alter the master or individual department codes.
This procedure can only be performed by a supervisor who possesses the master department password.
Enter this password before proceeding.
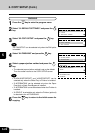
8
Enter the department name and press the key.
Tip
The optional FAX board is required to enter characters. Thus
entry of the department name is not allowed without the
optional FAX board.
DEPARTMENT CODE
1.DELETE
2.MODIFY
3.RETAIN
7
Select “2.MODIFY” and press the key.
DEPARTMENT CODE
1.YES
2.NO
DEPARTMENT CODE
DEPARTMENT NUMBER: 07
HARDWARE GROUP
D