19
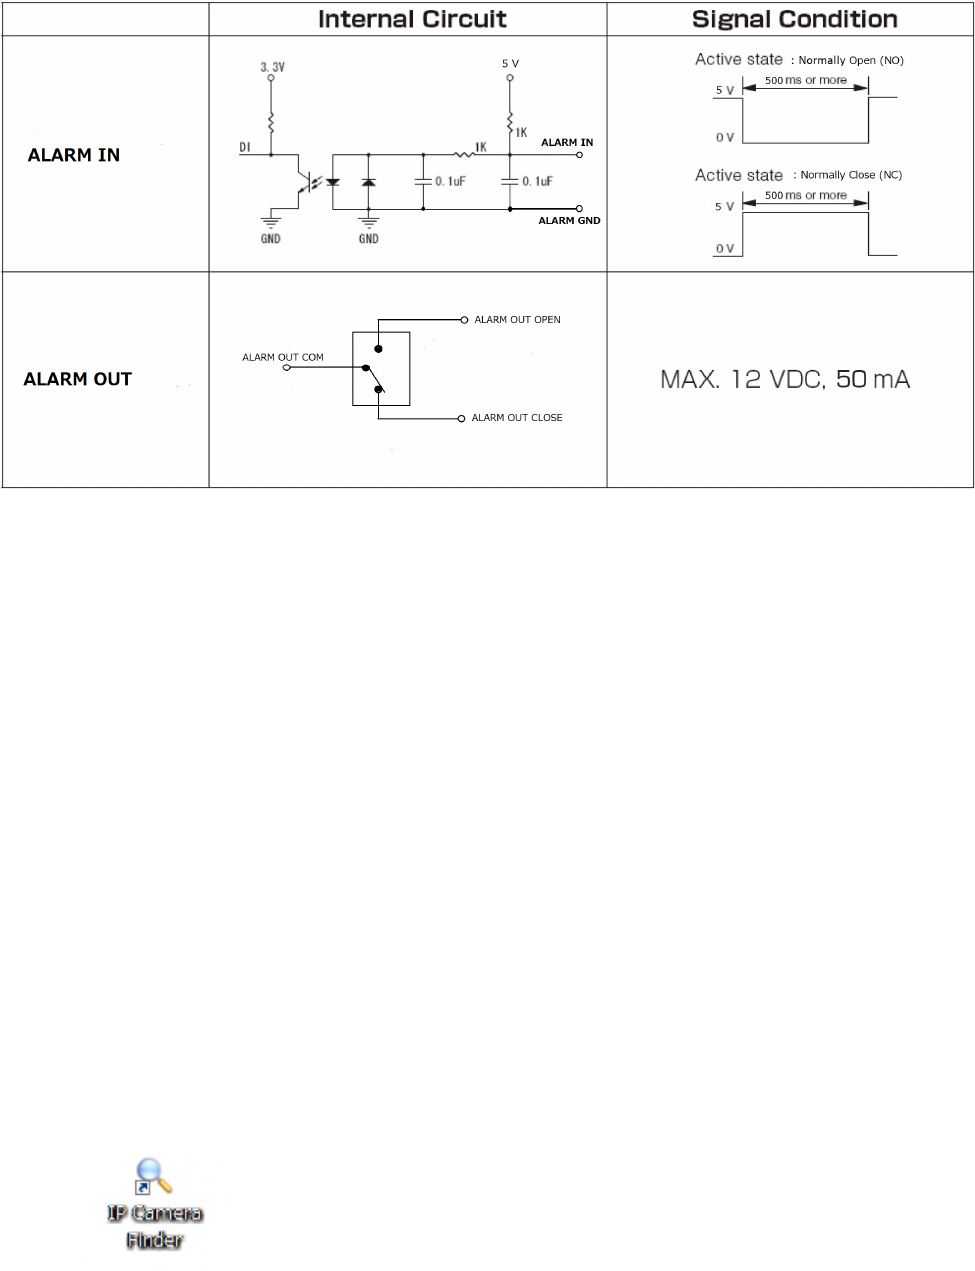
3.2 Optional connection such as alarm in/out devices to the camera.
Network Deployment
1. Connect the Camera to the Network
Using an Ethernet cable (not supplied), connect one end to the RJ45 connector of the
camera and the other end to the LAN port of the network switch via supplied RJ45 coupler.
And connect your client PC to this network switch.
2. Install “IP Camera Finder” on your client PC
To make the camera accessible to your network, you must configure appropriate network
settings for the camera. To do so, you may install the provided IP Camera Finder on your
computer for initial setup purpose.
1. Insert the provided CD-ROM into your CD ROM drive.
2. Double-click Setup.exe of the folder of “IP Camera Finder”
3. Follow the prompts to finish installing.
4. The program automatically creates a shortcut icon on your desktop after it’s
successfully installed.
5. Start “IP Camera Finder” to Configure the Camera
Double-click the shortcut icon to launch the IP Camera Finder and click Search to start
searching
the camera. All the cameras currently connected to the same network will


