CONTENTS
19
Connections and installation
(Continued)
1
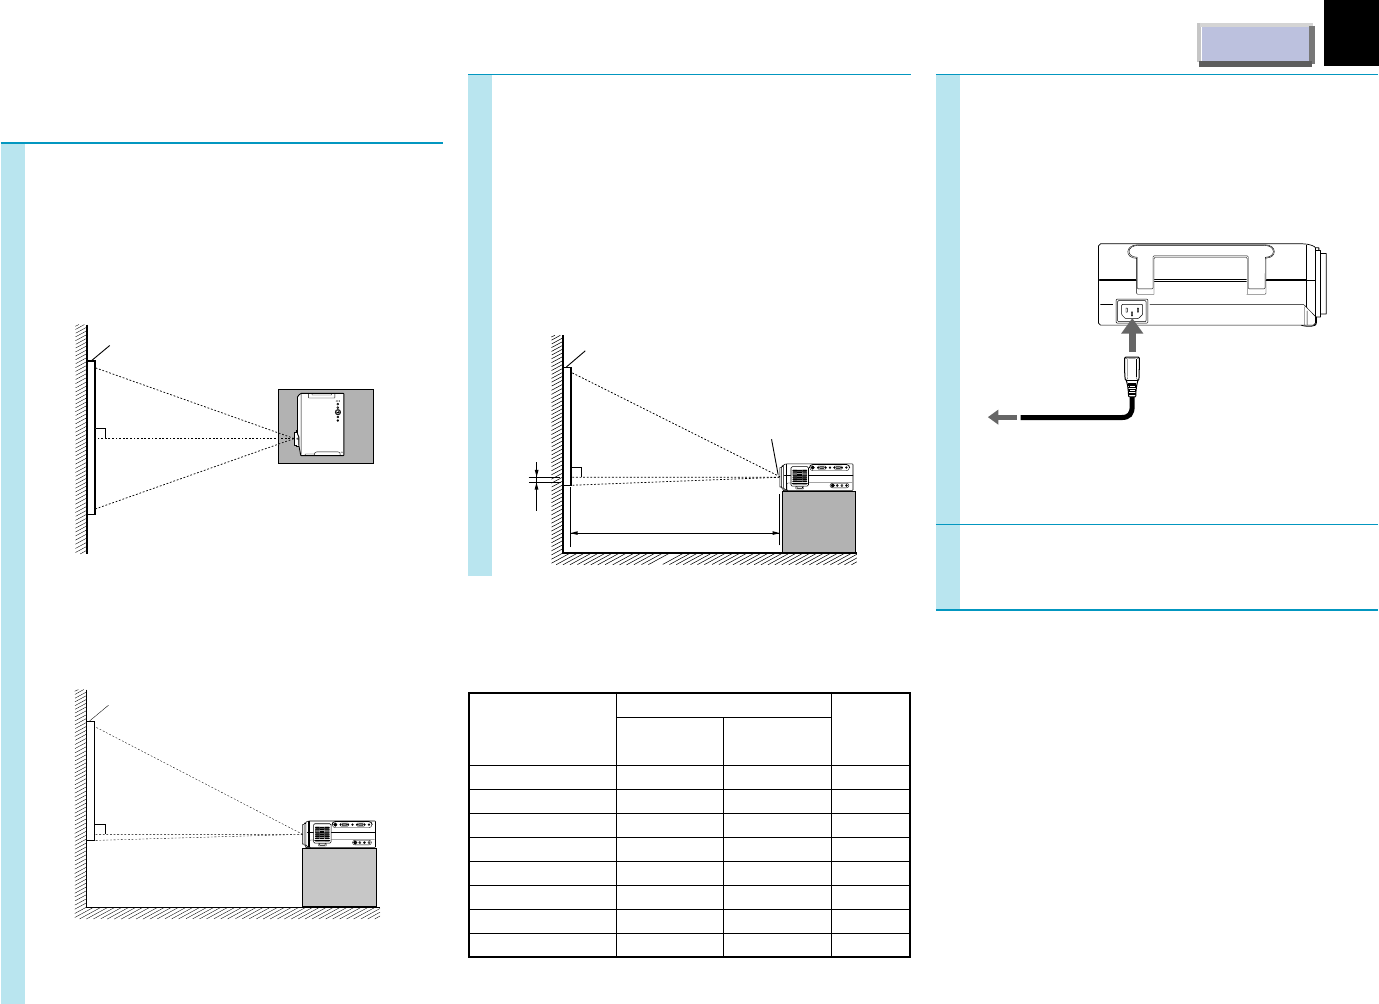
Place the projector on a steady,
level surface such as a table.
Point the projector squarely at the screen
for the best possible picture.
Point the lens straight at the center of the
screen as above.
Place the projector horizontally so that the
projecting light hits the screen squarely.
Top view
Side view
a: Distance between the lens and the screen
b: Distance between the lens height and the
bottom of projection area
Adjust the distance between
the lens and the screen.
The projection size depends on the
distance between the lens and the
screen.
Adjust the projection size by changing the
distances as shown below.
2
Screen size
(inches)
23
40
60
80
100
150
200
250
b (cm)
4
6
9
12
15
23
30
38
Minimum
(WIDE)
–
1.56
2.373
3.186
3.999
6.031
8.064
10.096
Maximum
(TELE)
1.132
2.017
3.059
4.1
5.142
7.746
10.35
–
a (m)
Connect the power cord.
• Insert one end in the AC IN socket on
the projector.
• Insert the other end in a wall outlet.
The ON indicator lights in orange and the
projector turns to standby mode.
Take off the lens cover.
3
• The values are approximations.
4
(Continued)
To a wall outlet.
Screen
90°
Screen
90°
Screen
90°
Lens
a
b


