CONTENTS
18
Connections and installation
Projector placement
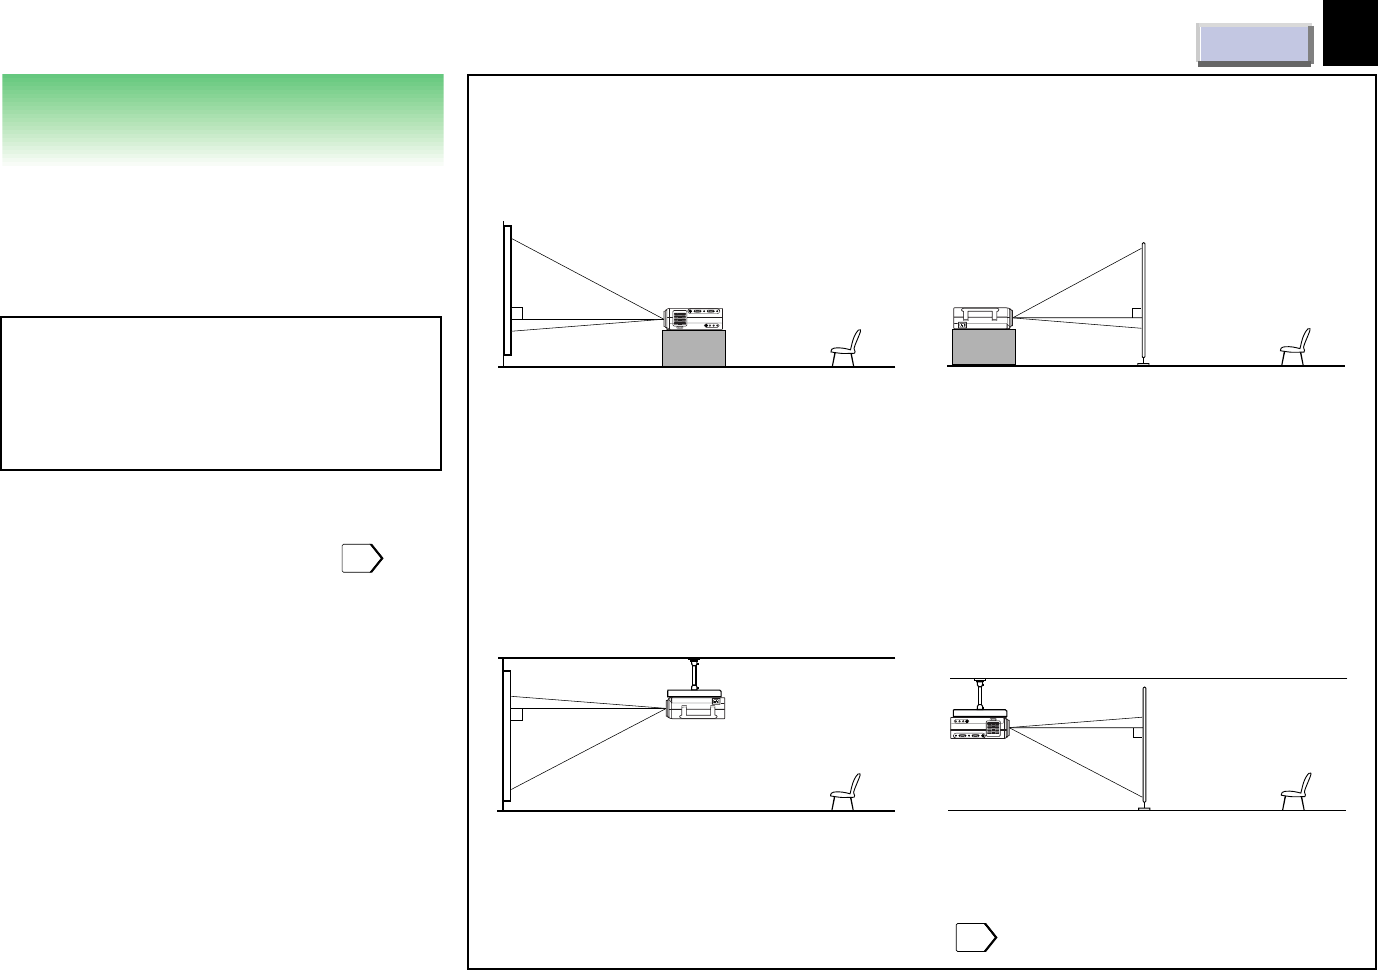
There are four ways of installing this projector
as shown right. This section explains the
standard case of the floor-mounted front
projection.
CAUTION
• When a ceiling mount is required, please
consult with the dealer.
• When carrying the unit, always handle the
carrying handle.
Preparation
• Select a room that can be darkened.
• Refer to the table on the next page
19
for
the screen size and required distance.
(Continued)
Floor-mounted front projection
Viewing a picture projected on the front of
the screen from a floor.
Floor-mounted rear projection
Viewing a picture projected through the
back of the screen from a floor installation.
Ceiling-mounted front projection
(The document imaging camera model
could not be mounted on the ceiling.)
Viewing a picture projected on the front of
the screen from a ceiling installation.
Ceiling-mounted rear projection
(The document imaging camera model
could not be mounted on the ceiling.)
Viewing a picture projected through the
back of the screen from a ceiling
installation.
• When installed the projector in the way except the floor-mounted front projection, make the
setting of the projecting orientation on the menu.
28
Viewer
Translucent screen
Viewer
Translucent screen
Viewer
Viewer


