


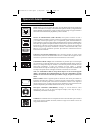

240V
230V
220V
230V
3
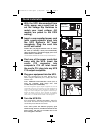
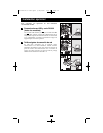
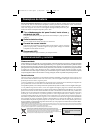
Quick Installation
With the UPS disconnected from
utility power, use a small tool to
set the Voltage Dip Switches to
match your input voltage. (All
models are preset to the 230V
setting.)
Insert a user-supplied power cord
(with country-specific plug) into
the UPS System's AC input
receptacle. Plug the cord into
an AC wall outlet.
NOTE! after you plug the UPS into a live AC outlet,
the UPS (in “Standby” mode) will automatically
charge its batteries,* but will not supply power to its
outlets until it is turned ON.
* The BATTERY CHARGE LED will be the only LED illuminated.
Find one of the power cords that
came with the UPS. Insert the
cord's C13 connector into
computer's C14 AC inlet. Insert
the cord's C14 plug into any UPS
C13 output receptacle.
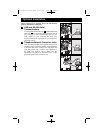
Plug your equipment into the UPS.
Plug your equipment into the UPS. Repeat Step 3
above using the additional power cord(s) that came
with the UPS.
Note: Additional interconnection cords (C13 to
C14) are available from Tripp Lite. Call
773-869-1234 (Part # P004-006).
Your UPS is designed to support computer equipment only. You will
overload the UPS if the total VA ratings for all the equipment you
connect exceeds UPS output capacity. To find your equipment’s VA
ratings, look on their nameplates. If the equipment is listed in amps,
multiply the number of amps by 240 to determine VA. (Example:
1 amp × 240 = 240 VA). If you are unsure if you have overloaded your
UPS's outlets, see “OUTPUT LOAD LEVEL” LED description.
Turn the UPS ON.
Press and hold the “ON/OFF/STANDBY” button for
one second. The alarm will beep once briefly after one
second has passed. Release the button.
Note: UPS system will function properly upon
initial startup; however, maximum runtime for the
unit's battery will only be accessible after it has
been charged for 24 hours.
1
1
2
5
3
4
5
2
3
4
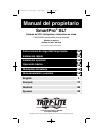
SMX750SLT,
SMX1050SLT
& SMX1500SLT
201112134 93-3152.qxd 1/18/2012 2:16 PM Page 3