1
2 3
3
1 2 4
3
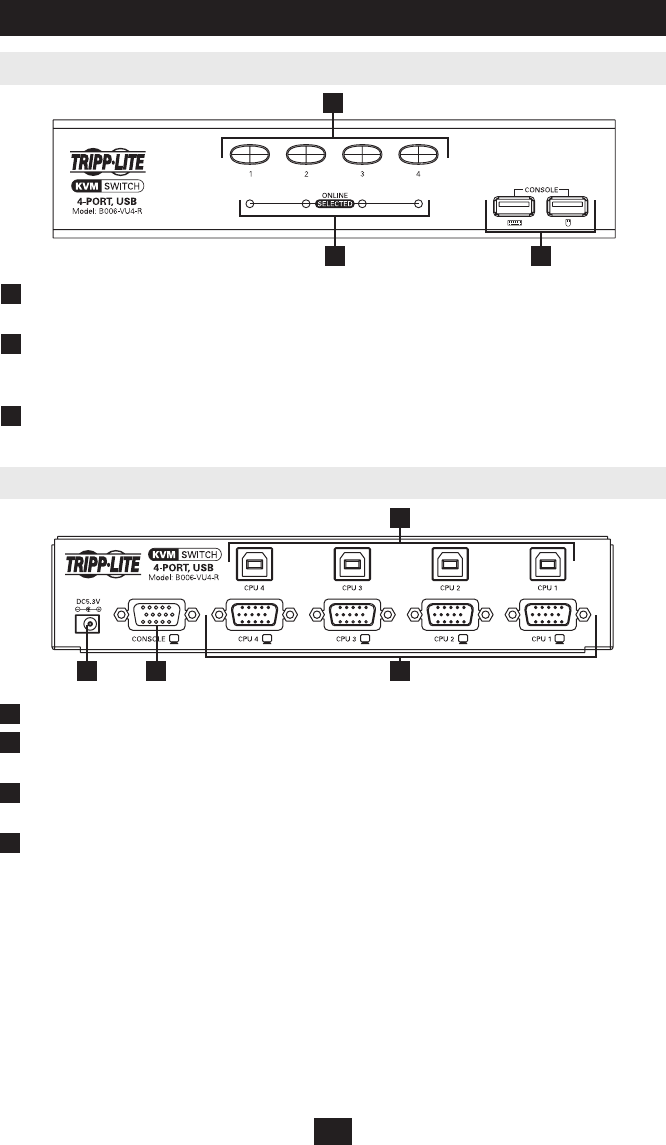
Front Panel
Product Features (continued)
1
Port Selection Pushbuttons—Press the button of the desired port to switch the focus of
the KVM switch to another computer.
2
Port Status LEDs—The LED will illuminate a dim or light orange to indicate that a
computer is connected to the port and is powered-on. The LED will illuminate a bright
orange to indicate that the corresponding port currently has the KVM switch’s focus.
3
Console Keyboard/Mouse Ports—The console’s USB Keyboard and USB Mouse
connect to the KVM switch here.
Back Panel
1
Power Jack—The included external power supply connects here.
2
Console Video Port—The console’s VGA, SVGA or Multisync monitor connects to the
KVM switch here.
3
Computer USB Ports—The USB B connector on the P758-Series KVM Cable Kit
connects to the KVM switch here.
4
Computer Video Ports—The HD15 Female connector on the P758-Series KVM Cable
Kit connects to the KVM switch here.
200909075 93-2937.indb 3 12/15/2009 4:09:29 PM


