


www.ultramagicard.com
AVALON and AVALON DUO Printer USER MANUAL
Page 4 of 31
1. Installing the Printer (copy of the QuickStart Guide)
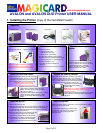
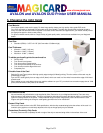
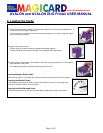
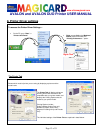
1. Unpacking
Avalon Printer Hopper and Stacker Power Cable USB Cable Driver CD
2. Consumables
Cleaning Cards & Roller Dye Film and Cards
Note: To complete installation and begin
using your printer you will require a roll of
Magicard dye-film and cards (not included).
3. Printer location requirements
• Sufficient space for:
- opening the top cover
- cable access at the rear.
- allowance for air circulation.
• An adequately ventilated dust free room.
• Access to a properly grounded power supply.
• Ambient temperature +10 to 30 degrees C.
• Relative humidity 20 - 70%.
• Protection from direct sunlight and
chemicals.
• Protection from abrupt temperature changes.
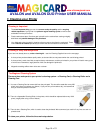
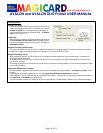
4. Attach the card output
stacker
Insert the card collection stacker into the
aperture in the front panel and hook into
place. The stacker can hold up to 50, 30mil
thick cards, after which it should be
emptied. The printer can be operated
without the stacker if you wish.
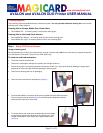
5. Attach the Card Feed Hopper
1. Open a clean pack of cards and make sure they
are not sticking together. Load the cards into the
feed hopper. Avoid touching the card surfaces
because finger marks can effect image quality.
Note: When using magstripe cards,
ensure the stripe is on the right and
underneath when viewed from the front.
2. Tilt the loaded hopper back as shown, and lower
gently into the receptacle at the rear of the
printer. You will be able to lower the hopper
about an inch (25mm).
3. At this point, tilt the hopper forward to the vertical
position and lower all the way down until the
hopper is completely within the body of the
printer.
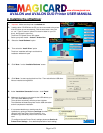
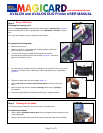
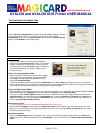
6. Prepare the cleaning cassette
Press down on the top cover, operate the top cover
release catch and open the cover. First remove the
white tape holding the black plastic cleaning cassette.
Grip the handle between finger and thumb, then push
and release the cleaning cassette. Remove the
orange tape and protective layer
from the disposable cleaning
cassette roller.
Note: This is a good time to familiarise yourself with
the way that this automatic cleaning system is
designed to operate.
Finally replace the cleaning cassette by inserting the
roller shaft into the U shaped guides and clicking
into place.
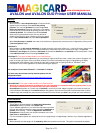
7. Install the dye film
1. Open a new roll of dye film.
2. Place the loaded spool into the rear clips and press it into place. The
orientation is correct when the bar code on the end of the spool to
the left hand side when viewed from the front. Rotate to make sure
that the slot engages with the lug.
3. Place the empty take up spool into the front clips,
and adjust the film tension so that the film is
lying flat and straight between the two spools.
4. Press the top cover down until it clicks into the
closed position. The printer will automatically
recognize the type of film that has been loaded.
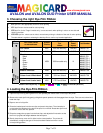
8. Plug in the printer
Make sure that the printer is turned Off, i.e. the On/Off button is slightly
protruding from the front panel.
Plug the power supply lead provided into the
socket on the rear panel of your printer, and
the other end into a properly grounded
electrical outlet.