


www.ultramagicard.com
AVALON and AVALON DUO Printer USER MANUAL
Page 18 of 31
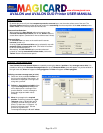
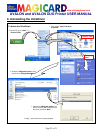
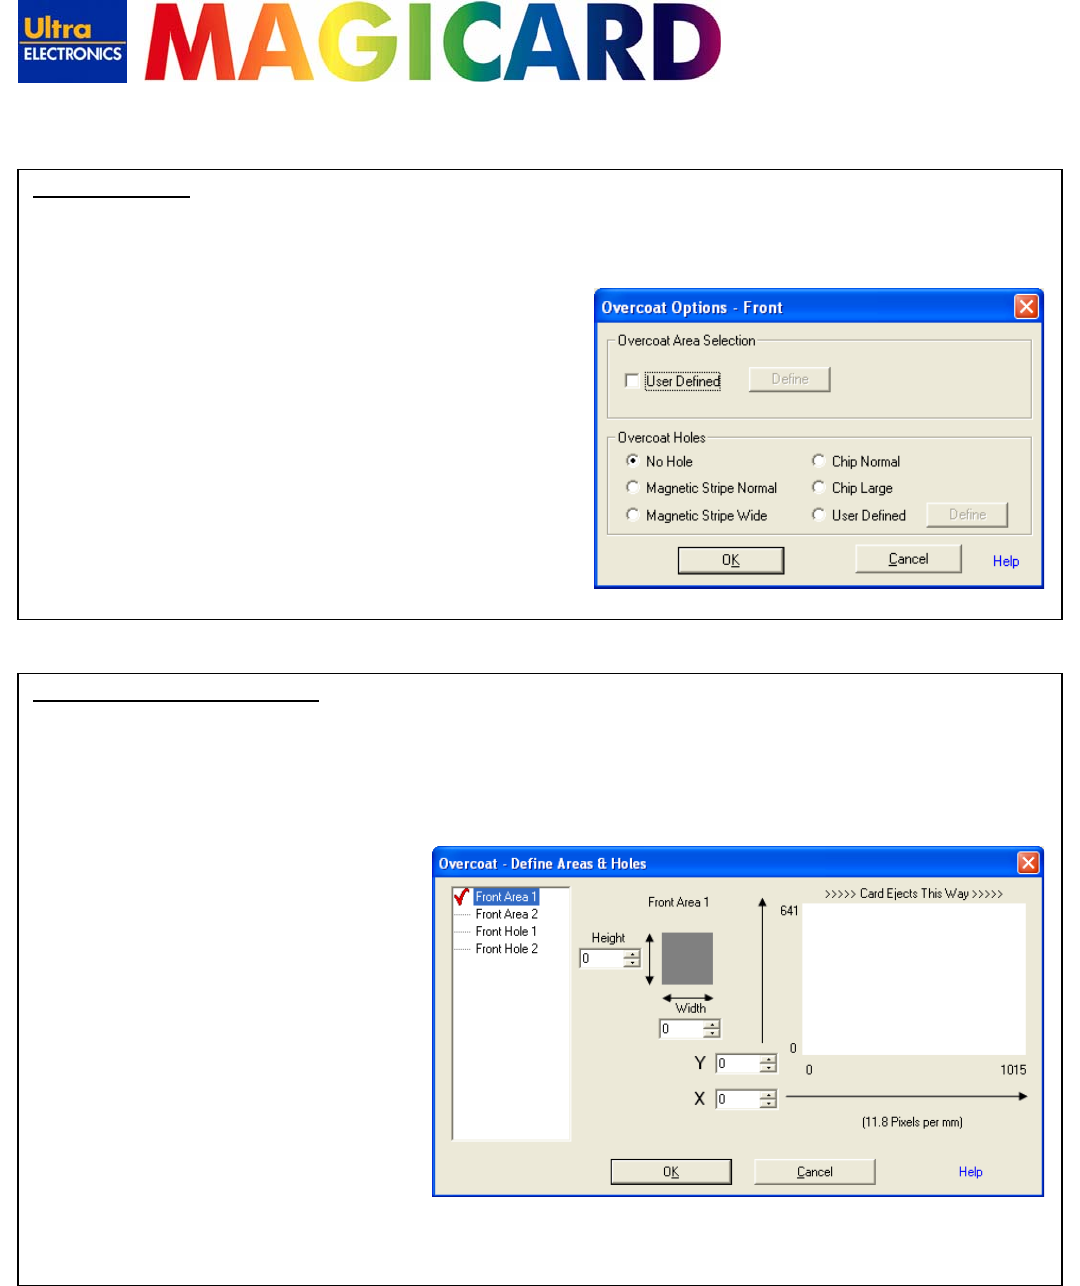
Overcoat Options:
By default the printer will print the transparent protective overcoat layer over the entire surface area of the card. The
Overcoat Options window provides advanced controls for customising the size and position of the area covered, and to
insert ‘holes’ (of no overcoat) into that overcoat area.
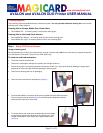
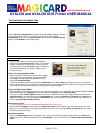
Overcoat Area Selection:
When enabled, the User Defined option gives access to the
overcoat area definition window; click on the ‘Define’ Button to
access these options. (See below for how to define areas & holes).
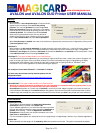
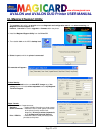
Overcoat Holes:
An overcoat hole is an area on the card that will have no
overcoat printed on it.
A variety of pre-set Overcoat Holes can be selected for use with
magnetic stripe and smart chip cards. (The holes will conform
to the ISO standard positions).
Alternatively, the User Defined option provides advanced
controls for creating customised overcoat holes, click on the
‘Define’ Button to access these options.
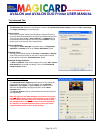
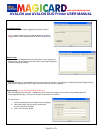
Overcoat
–
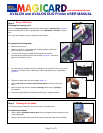
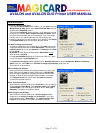
Define Areas & Holes:
User Defined Overcoat Areas & Holes are created by entering the size and position of the coverage area or hole. It is
possible to define up to 2 Overcoat Coverage Areas and up to 2 Overcoat Holes, these will appear in a preview window in
the right hand side, Areas will appear as Grey polygons and Holes will appear as Black polygons.
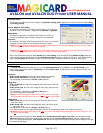
Defining a custom coverage area (or hole):
1) Select one of the available Profiles from
the list on the left side of the window - its
details will be displayed on the right side
along with a preview.
2) Define the size (height and width) of the
required coverage area (or hole) and it
will be displayed as a rectangle in the
preview window - use this rectangle to
gauge the height and width values
correctly.
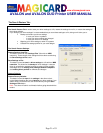
3) Move the rectangle to the required
position. Positioning is based on a grid
reference using an X (left/right) and Y
(up/down) axis and moving in units of
pixels (Tip: there are 11.8 (approx. 12)
pixels per millimetre (mm)). Use the
preview as a guide while
increasing/decreasing the X and Y values.