


8. From Windows explorer, right click on the removable drive and “Eject” the disk.
9. Wait 2-5 seconds, and then choose “Safely Remove USB Mass Storage Device” by clicking on the
“Safely Remove Hardware” ICON in the bottom right Windows toolbar.
10. Disconnect the CPU adapter cable from the computer, wait 15 second, position S2 to the “OFF”
position.
The UltraLink 2 is now configured and ready to install to your network.
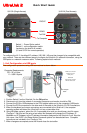
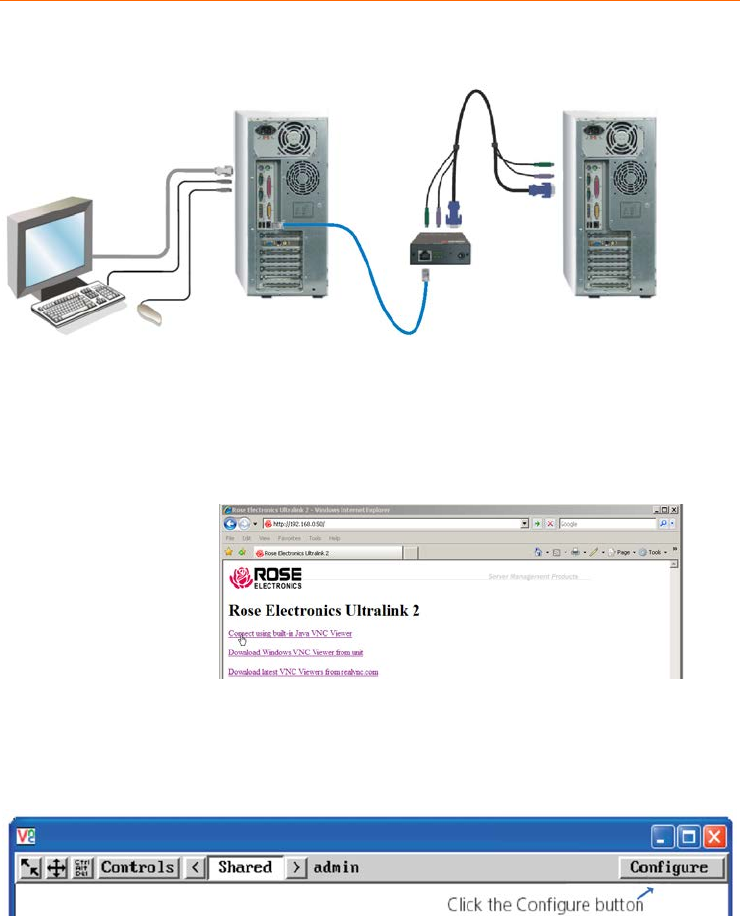
2- Unit Configuration via Network crossover connection
To modify the IP address, connect the UltraLink 2’s RJ45 port to a computer configured with
an Ethernet card. Use a network cross over cable to connect the computer to UltraLink 2.
Connect the computer to be accessed as shown below using the supplied CPU adapter
cable.
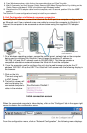
1- On a windows operating system, access the control panel, network tab on the computer
being used to configure the UltraLink 2 and change the existing IP address to
192.168.1.40 and the IP network mask to 255.255.255.0. This change creates a
compatible standalone network between the UltraLink 2 and the computer.
2- From the computer used to configure the unit, start a web browser and enter the IP
address 192.168.1.42 as the URL. The UltraLink 2 will answer with the following display in
the browser.
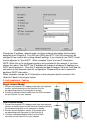
1- Click on the link
“Connect using built-
in VNC Viewer”.
2- The built-in viewer will
start and display the
connected computer’s
video in the window.
Initial connection screen
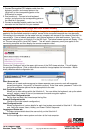
When the connected computer’s video display, click on the “Configure” tab in the upper right
corner to display the configuration menu.
From the configuration menu, click on “Network Configuration”, the following menu displays.
Network
cross over cable
Computer needed for power
to the UltraLink 2
Dual access
model, connect
to lower PS/2
ports