7
7
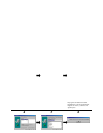
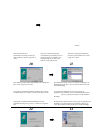
You return to the PageManager window
to edit the scanned image.
Vous retournez à la fenêtre de
PageManager pour éditer l’image
scannée.
Volverá a la ventana PageManager,
donde podrá modificar la imagen
digitalizada.
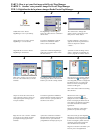
How to get your first image with Caere OmniPage LE
Scanner votre première image Caere OmniPage LE
Digitalización de la primera imagen Desde Caere OmniPage LE
1
1
2
2
3
3
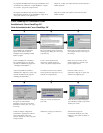
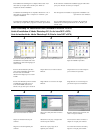
Select StartàProgramsàCaere
ApplicationsàOmniPage Limited
Edition to run the OmniPage LE
program.
Click on the “Acquire Image” (as seen in
the red circle in the picture above) in the
OmniPage Limited Edition window.
Click on the “Scan” button to start the
scanning procedure.
Sélectionnez DémarreràProgrammesà
Caere ApplicationsàOmniPage Limited
Edition pour exécuter le programme
OmniPage LE.
Cliquez sur l’icône d’acquisition
d’images (dans le cercle rouge dans
l’image ci-dessus) dans la fenêtre de
OmniPage Limited Edition.
Cliquez sur le bouton « Scan » pour
lancer la procédure de scanage.
Seleccione Inicio à Programas à Caere
Applications à OmniPage Limited
Edition para ejecutar el programa
OmniPage LE.
Haga clic en el icono “Acquire Image”,
señalado con un círculo rojo en figura, en
la ventana OmniPage Limited Edition.
Haga clic en el botón “Scan” para iniciar
el proceso de digitalización.
4
4
5
5
6
6
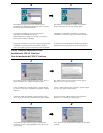
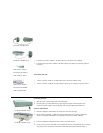
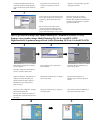
The image scanned appears in the
window of the OCR program. Click on
the “OCR” icon to execute the OCR
function.
The OCR recognition program is
processing.
Press “Stop Scanning” to quit the OCR
program.
L’image scannée apparaît dans la fenêtre
du programme OCR. Cliquez sur l’icône
OCR » pour exécuter la fonction
d’OCR.
Le programme de reconnaissance OCR
traite le texte.
Cliquez sur « Stop Scanning » pour
quitter le programme OCR.


