


32
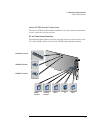
6 Support Tools
Running the HP Vectra PC Checkup
Running the HP Vectra PC Checkup
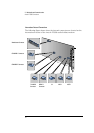
HP Vectra 500 Series PCs are equipped with a checkup program which can
be used to identify and fix hardware-related problems. (The checkup
program is an enhanced version of the diagnostics toolkit which was
delivered with the Spring 1996 models—models 510 and 520.)
Generating an HP Vectra PC Checkup Disk from Within Windows 95
To generate a checkup disk you will need a blank floppy disk available.
1 Click the Start button in the bottom left corner of the screen.
2 Click Programs, then HP Support Utilities, then Diagnosis, then Create
Your PC Checkup Disk.
3 Follow the instructions on the screen.
Generating an HP Vectra PC Checkup Disk from the Product
Recovery CD-ROM
Refer to the instructions supplied with the Product Recovery CD-ROM.
Running the HP Vectra PC Checkup from a Floppy Disk
1 Shut down the PC in the normal way if you can.
2 Turn off the PC.
3 Insert the checkup program floppy disk that you have created.
4 Turn on the PC.
5 Follow the instructions on your screen.
Running the HP Vectra PC Checkup from the Hard Disk
1 Close down all applications if you can, as the checkup program first exits
from Windows 95.
2 Click Start.
3 Point to Programs, then HP Support Utilities, then Diagnosis.
4 Click Run your PC Checkup.
5 Follow the instructions on your screen.