


Please read following instructions carefully to ensure
proper operation of the CCU-11B.
1. Be careful about damage by static electricity as the
CCU-11B incorporates CMOS IC's. Do not touch com-
ponents and connectors.
2. Turn off the AC power switch when you take out or
insert the CCU-11B unit or any other unit.
3. Always insert the CCU-11B unit into the "CCU" slot.
Otherwise, there is a danger that the unit will be
damaged.
4. Make sure mini-jumper for battery back-up is always
placed in "ON" position each time it is used.
5. Incorrect setting of function select switches may lead
to incorrect performance.
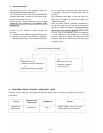
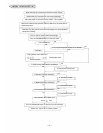
3. PRECAUTIONS FOR INSTALLATION OF CCU-11B.
6. Even if you do not need programming functions, be
sure to carry out initial programming and registration
at station No. 11 when you install the new unit.
Otherwise, some other functions may not work
properly.
7. The Ni-Cd battery GB50-3FA1 is capable of saving im-
portant memory registration data even at times of
power failure and we suggest you replace it at least
every 4 years.
8. When shipping the CCU-11B unit independently, place
the mini-jumper for battery back-up in "OFF"
position. Then cover CCU back with cardboard, wrap
connector section in aluminium foil and put it in a con-
ductive bag.
— 3 —
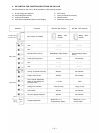
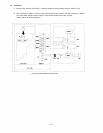
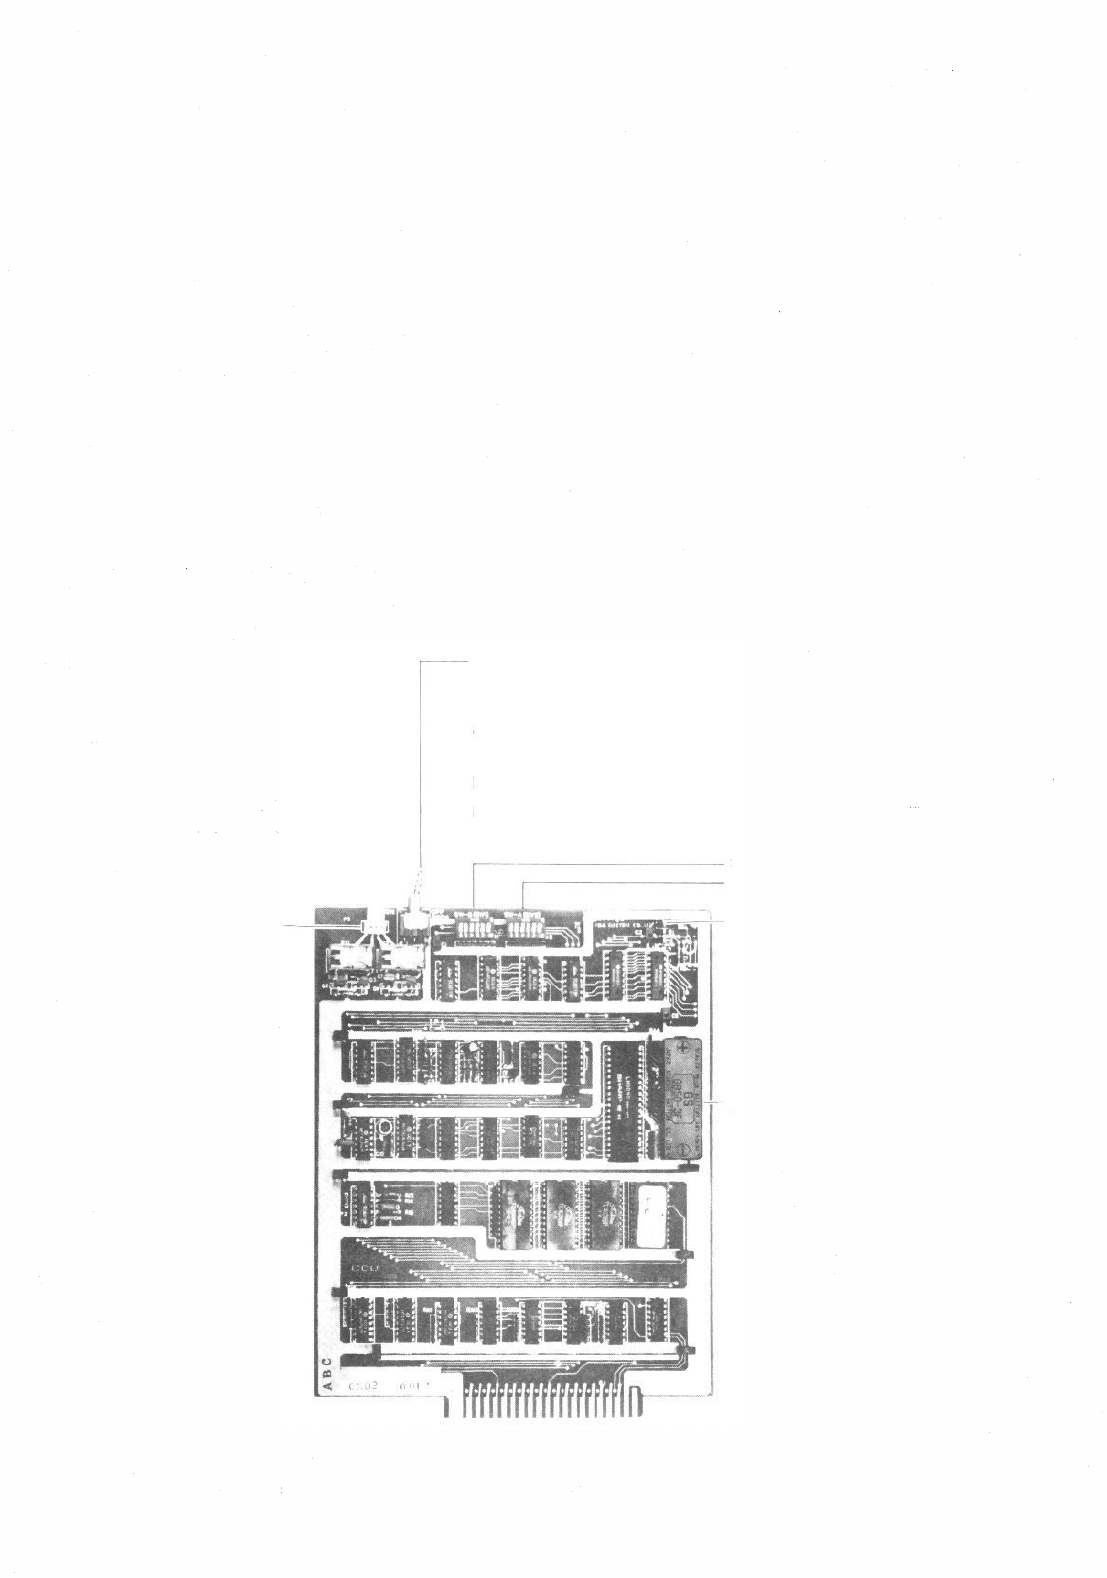
PROGRAM SWITCH for No. 11 Programming
Set this in "ON" position only at time of initial pro-
gramming of the exchange and registration of functions.
In this case, station No. 11 is "programming station" but
becomes a normal station when switch is placed in "OFF"
position.
Remote Control
Replay Output
(RY1
and
RY2)
SW-B (1 ~ 6)/SW1 These switches
SW-A (1 ~ 6)/SW2 select functions.
Mini-Jumper for Battery Back-up.
Ni-Cd Battery
GB50-3FA1 (3.6V 50mAH)