WiebeTech LLC
Notebook DriveDock v4 User Manual - 2 -
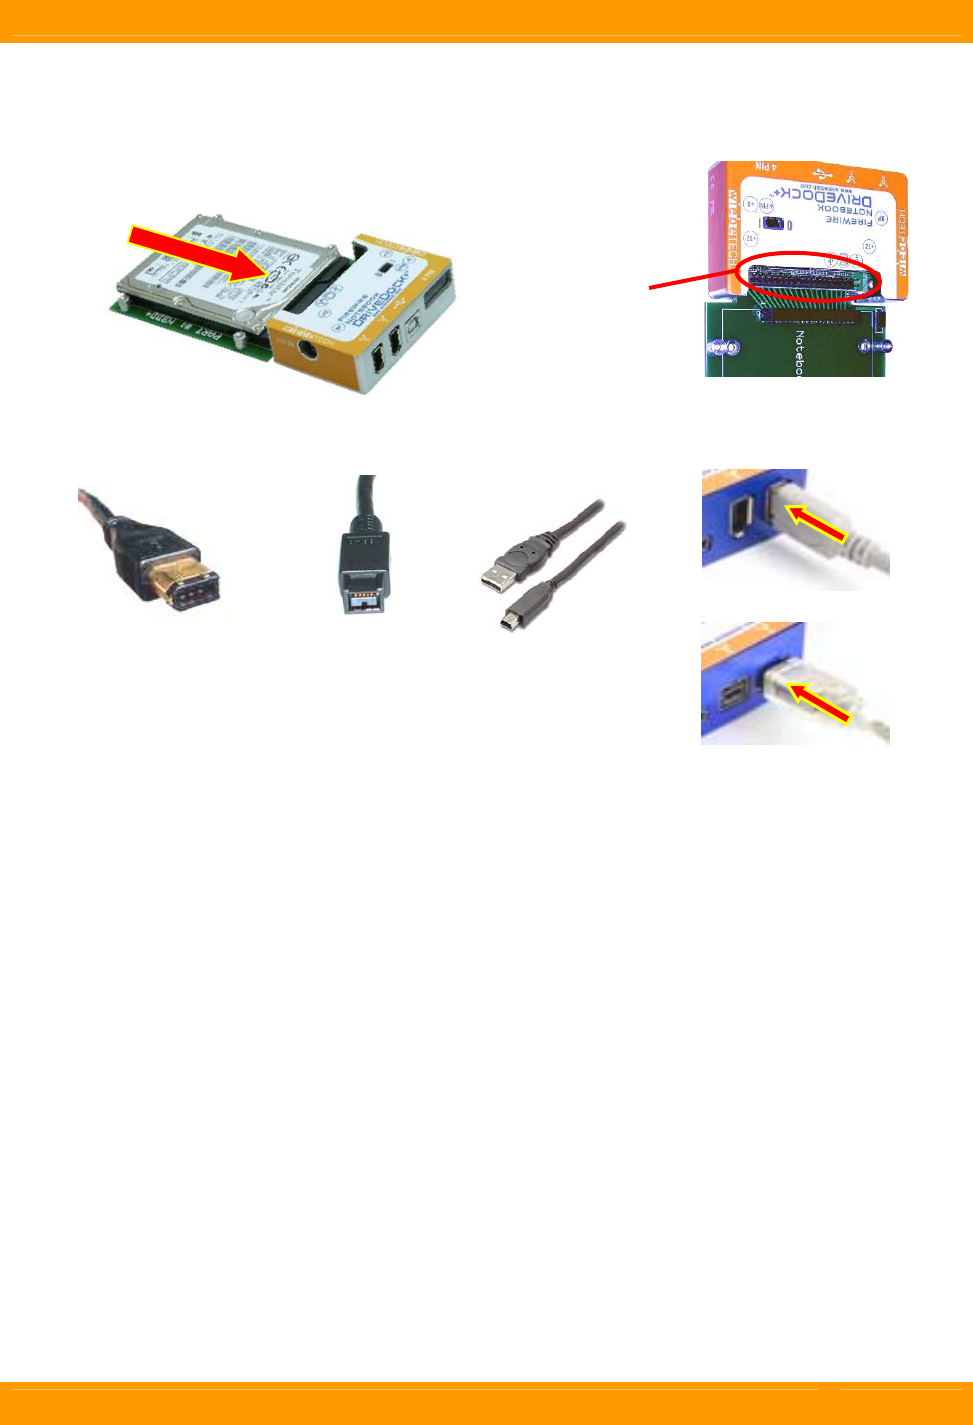
3. Connect the hard drive to the dock. If you’ve removed the drive from a laptop computer, it may be inside a
mounting sleeve. You’ll need to remove this so that the drive will fit with the dock. Place the drive onto the green
plate with the label side up. Carefully slide the drive forward until the pins are fully inserted into the IDE connector. If
you wish, you may secure the drive in place with the included screws.
4. Connect the FireWire or USB cable from your computer into the appropriate port on the DriveDock.
The upright pins
are not used in
this model.
N
B
D
D
v
4
N
B
D
D
8
v
4
FireWire 400 FireWire 800 USB
5.
Connect power to the dock. There are three options:
a. The Notebook DriveDock can be bus powered through FireWire, and therefore does not require an
additional power source when used with powered FireWire hosts.
b. For USB usage, or to connect to FireWire hosts lacking sufficient bus power, plug in the optional AC adapter
(available from WiebeTech). When the AC adapter is connected, the LED labeled “+12” will illuminate.
c. Alternatively, you may supply power through a standard 4-pin Molex connector. When power is connected
in this way, the LED labeled “4 PIN” will illuminate.
Your DriveDock is now ready to use! Turn on the unit by moving the power switch toward the side labeled “|”. When
power is on, the output LED “+5” will illuminate to show that power is going to the hard drive.
The red LED access indicator will light briefly after the unit is powered up, indicating that the FireWire bridge has
successfully established communication with the drive. Thereafter, it will light whenever the drive is accessed. If
your hard drive is already formatted, you can begin using it right away. New hard drives will need to be formatted
before they can be used.


