


12
975-0123-01-01 Rev A
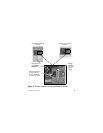
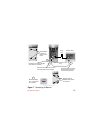
To connect the remote:
1. Remove the front cover of the C-Series controller by removing the
four screws on the front cover of the unit.
2. Route one end of the serial communications cable (SCC) through a
knockout on the controller. Use a strain relief to hold and protect
the cable.
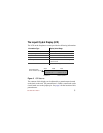
3. Plug this end of the yellow cable into the RJ-15 Port on the circuit
of the controller.
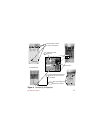
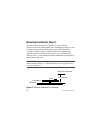
4. Route the other end of the SCC to where the remote display will be
located. Plug this end of the cable into RJ-15 Port on the backside
of the remote. Ensure you route it through the mounting surface
(i.e., wall or panel) if necessary.
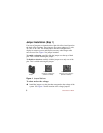
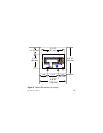
5. Install the remote where desired. Four holes are provided for
installing screws or fasteners to secure the display in the mounting
surface.
See “Mounting the Remote (Step 3)” on page 14 for additional
information about how to mount the remote.
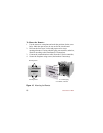
6. Secure the original faceplate in place using the four screws
removed in Step 1.
Important:
The LED does not need to be removed when using
the remote.