


NOTE
NOTE 1: If you are trying to connect the monitor to a laptop computer, please make
sure to enable the 15-Pin D-SUB external monitor output located at the back of your
laptop computer. Some laptop computers have three modes: Laptop Display Only,
Laptop Display plus External Monitor, and External Monitor Only. If this is the
case, please switch to the External Monitor Only mode.
NOTE 2: If you have the 1020TSV, the Touch Screen device driver must be
installed onto your computer in order for the Touch Screen to become functional.
Touch Screen drivers and software for different operating systems can be found in
the included CD-ROM disc. You can refer to this manual for a walkthrough of
Touch Screen Driver installation under Microsoft Windows XP.
NOTE 3: The maximum voltage supported by the monitor is 24V DC. Feeding the
monitor with higher voltage will damage the monitor and void the warranty. Please
use a fused power source if you decide to wire the monitor directly to your car’s
electrical system. It is also crucial that you check the polarity of the connection.
NOTE 4: If the monitor is not displaying the VGA signal properly, the VGA signal
might be out of range. Please try changing your display refresh rate to 60, 70, 72, or
75Hertz.
NOTE 5: Please note that the LCD screen is made with high-precision technology.
However, black points or bright points of light (red, blue, or green) may appear
constantly on the LCD screen, and irregular colored stripes or brightness may appear
on the LCD screen. This is not malfunction. (Effective dots: more than 99.999%)
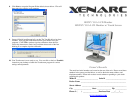
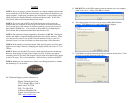
NOTE 6: Make sure your monitor has a Xenarc Laser Hologram sticker to validate
the authenticity of your monitor.
For Technical Support, please contact us at:
Xenarc Technologies Corp.
2770 S. Harbor Blvd., Unit A.
Santa Ana, CA 92704
TEL: 714-546-1018
Toll Free: 888-656-6536
E-mail: service@xenarc.com
URL: www.xenarc.com
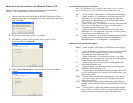
5. DO NOT Plug in the USB connector from the monitor into your computer
when it asks you to. Simply Click OK to continue.
6. The setup program will ask you if you want to enable Multi-Monitor
Support. Click Next again to enable Multi-Monitor Support.
7. Click Next to accept the Destination Directory default, shown below. Click
on Browse to change Destination Directory.