


Configuring SNMP
System Administrator Guide
4-18
d. On the Administrative Security Settings page, clear the View Configuration Web
Pages and Modify Configuration Web Pages check boxes for users who should not
have access to these pages.
6. Set up the SNMP Administrative and Key User accounts to configure SNMP v3:
a. Select the Protocols folder on the left navigation panel, and then select SNMP.
b. If prompted, enter your Admin or Key User name and password.
c. On the SNMP Configuration page, click the Configure SNMP v3 button and set up
the SNMP Administrative account. For more information, see Configuring SNMP v3
on page 4-20, or click the Help Button in CWIS help.
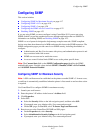
Configuring SNMP v1/v2c
Configuring SNMP v1/v2c Community Names
To configure SNMP v1v2c community names:
1. Launch your web browser.
2. Enter the printer’s IP address in the browser’s Address field.
3. Click Properties.
4. Select the Protocols folder on the left navigation panel.
5. Select SNMP.
6. If prompted, enter your Admin or Key User name and password.
7. On the SNMP Configuration page, click the Configure SNMP v1/v2c button.
8. To set community names for GET/SET SNMP queries and traps, enter information (up to
32 alphanumeric characters) in one or more of the following fields:
Note: These names are not displayed on this page, but are shown as a row of asterisks (*).
■ GET Community Name: Allows a host to perform SNMP GETS on the printer using
this community name.
■ SET Community Name: Allows a host to perform SNMP SETS on the printer using
this community name.
■ Trap Community Name: Allows a host to receive traps from the printer using this
community name.
Note: Hosts must have these community names configured in their applications to access
the printer using SNMP v1/v2c.
9. Click the Apply button to save the changes.