


Chapter 1: Installation Instructions 11
Important!
Do not connect additional computers or a network device
(such as a wireless access point, router, hub, or switch) to the
other ETHERNET ports at this time. These instructions will
let you know when to connect them.
Windows users only: If you are connecting via USB, plug one end
of the USB cable into the modem’s USB port and the other
end into your computer’s USB port.
3 Plug the power cube into a power strip or wall outlet and then
plug the power cube’s other end into the modem’s POWER
jack.
Important!
Use only the power cube shipped with the X5. Other power
cubes may damage your hardware.
The POWER light on the front panel of the modem should
become steady on, and the DSL light should blink. If the
POWER light does not turn on, make sure there is power at
the wall outlet or power strip where you plugged in the power
cube.
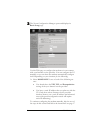
4 Turn the computer on.
Windows users: If you connected your computer to the USB
port, you may see a Found New Hardware box indicating the
progression of the installation. Typically no user action is
necessary. If you are using Windows XP, you may be required
to click Next.
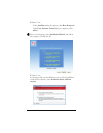
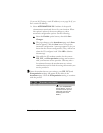
Depending on your operating system, you may also see a
Hardware Installation box or a Digital Signature Not
Found box. You can safely ignore these messages and click
Yes or Continue Anyway. If prompted, click Finish and/or
Yes to restart your computer to finish setting up your new
hardware.
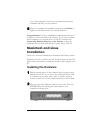
5 Plug one end of the supplied phone cord into the modem’s
DSL port and the other into the ADSL wall jack. The blinking