ZyAIR G-500 802.11g Wireless Access Point
12
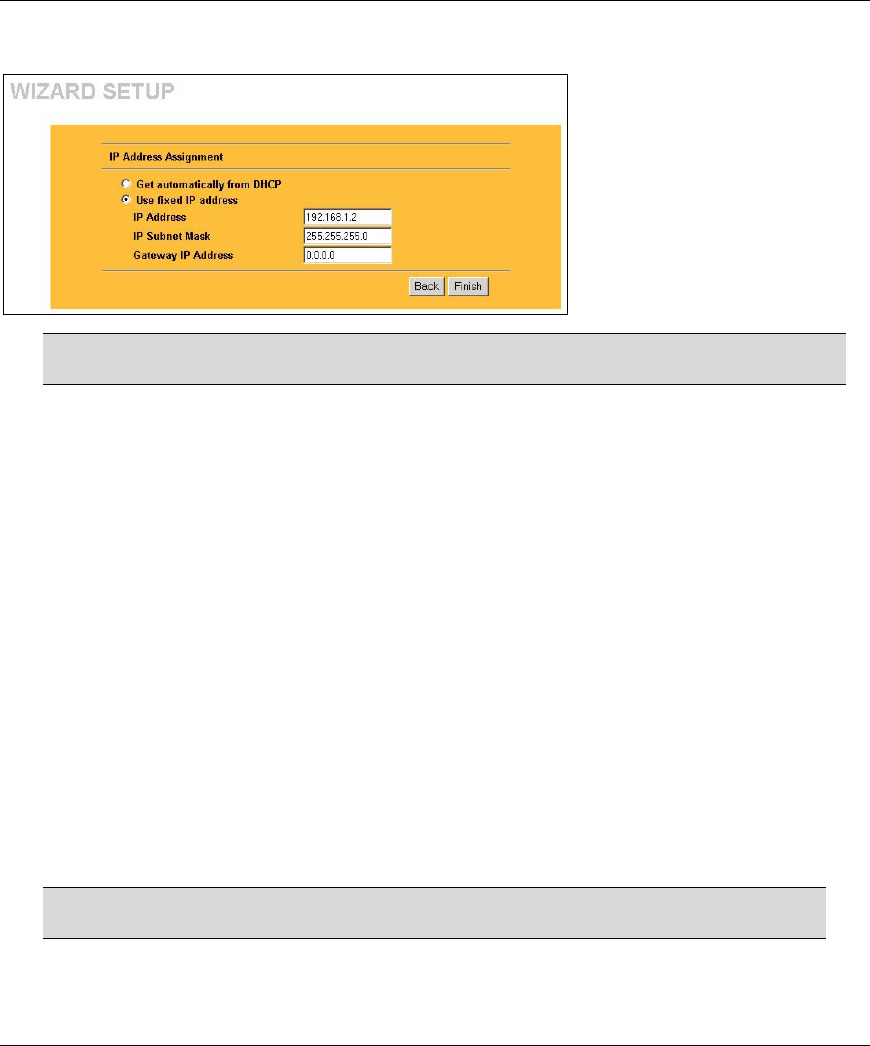
3. Fill in the fields in the last wizard configuration screen.
Select Get automatically from DHCP to
have the ZyAIR obtain an IP address
from a DHCP server.
You must know the IP address assigned
to the ZyAIR (by the DHCP server) to
access the ZyAIR again.
Select Use fixed IP address to give the
ZyAIR a fixed, unique IP address. Enter a
subnet mask appropriate to your network
and the gateway IP address if applicable.
Click Finish.
If you change the ZyAIR’s IP address, you must use the new IP address if you want
to access the web configurator again.
4. Change the wireless parameter settings in the wireless stations to match those of the ZyAIR. Refer
to the user’s guide for your wireless adapter.
5 Hardware Mounting Installation
In general, the best location for the access point is at the center of your intended wireless coverage area. For
better performance, mount the ZyAIR high up free of obstructions.
Free-standing
Place your ZyAIR on a flat, level surface (on a desk or shelf) that is strong enough to support the weight of
the ZyAIR with connection cables.
Wall-mounted
Follow the steps to attach your ZyAIR to a wall.
1. Locate a high position on the wall that is free of obstructions.
2. Connect two screws (not included) in the wall 75mm apart. Use screws with 6mm ~ 8mm (0.24" ~
0.31") wide heads. Do not screw the screws all the way in to the wall. Leave a small gap between
the head of the screw and the wall. The gap must be big enough for the screw heads to slide into
the screw slots and the connection cables to run down the back of the ZyAIR.
Make sure the screws are securely fixed to the wall and strong enough to hold
the weight of the ZyAIR with the connection cables.
