


10
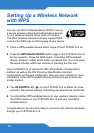
Setting Up a Wireless Network
with WPS
You can use Wi-Fi Protected Setup (WPS) to set up
a secure wireless network and add wireless devices
to your wireless network at the touch of a button.
The other wireless devices must also support WPS.
Look for the WPS logo on the housing of your device.
1. Place a WPS-enabled device within range of the P-870HW-51a v2.
2. Press the WPS WLAN ON/OFF button ( ) on the P-870HW-51a v2
for five seconds. Press the WPS button on another WPS-enabled
device. It doesn’t matter which button is pressed first. You must press
the second button within two minutes of pressing the first one.
Your P-870HW-51a v2 allows the PBC (Push Button Configuration)
method, as well as the PIN (Personal Identification Number)
configuration via the web configurator. See your User’s Guide for more
information. Other WPS-enabled devices should provide at least one
similar method.
3. The WLAN/WPS LED ( ) on the P-870HW-51a v2 blinks for a few
seconds, then shines steadily, indicating your devices are connected.
4. To add another WPS-enabled device to your wireless network, press
the WPS buttons on your P-870HW-51a v2 and your next WPS-
enabled device.
Congratulations! You are now ready to connect to the Internet wirelessly
through your P-870HW-51a v2.