P/2 DA2 WM/EC/D/AAP Series • Controls and Installation
P/2 DA2 WM/EC/D/AAP Series • Controls and Installation
2-11
Controls and Installation, cont’d
Connecting audio output
Before connecting audio output, determine whether your audio
system is unbalanced or balanced. Then, follow the instructions
below to connect unbalanced audio, or the instructions for
“Balanced audio” to connect balanced audio.
C Wiring the audio incorrectly may damage the audio
output circuits.
Unbalanced audio
To attach the P/2 DA2 WM F/EC F to an unbalanced audio
system, do the following:
1. Attach the audio cable to an unbalanced speaker input
connector (tip and sleeve).
2. Attach the audio cable to the audio cable connector (Extron
part number 10-319-10). Fasten the captive screws inside
the audio cable connector.
Fastening captive screws
3. Slide the audio cable connector into the audio output
connector on the interface.
Tip (+)
Sleeve ( )
Unbalanced Output
Left
Tip
Sleeve(s)
NO Ground Here
NO Ground Here
Tip
Right
CAUTION
For unbalanced audio, connect the
sleeve(s) to the ground contact.
DO NOT connect the sleeve(s) to the
negative (-) contacts.
Cabling
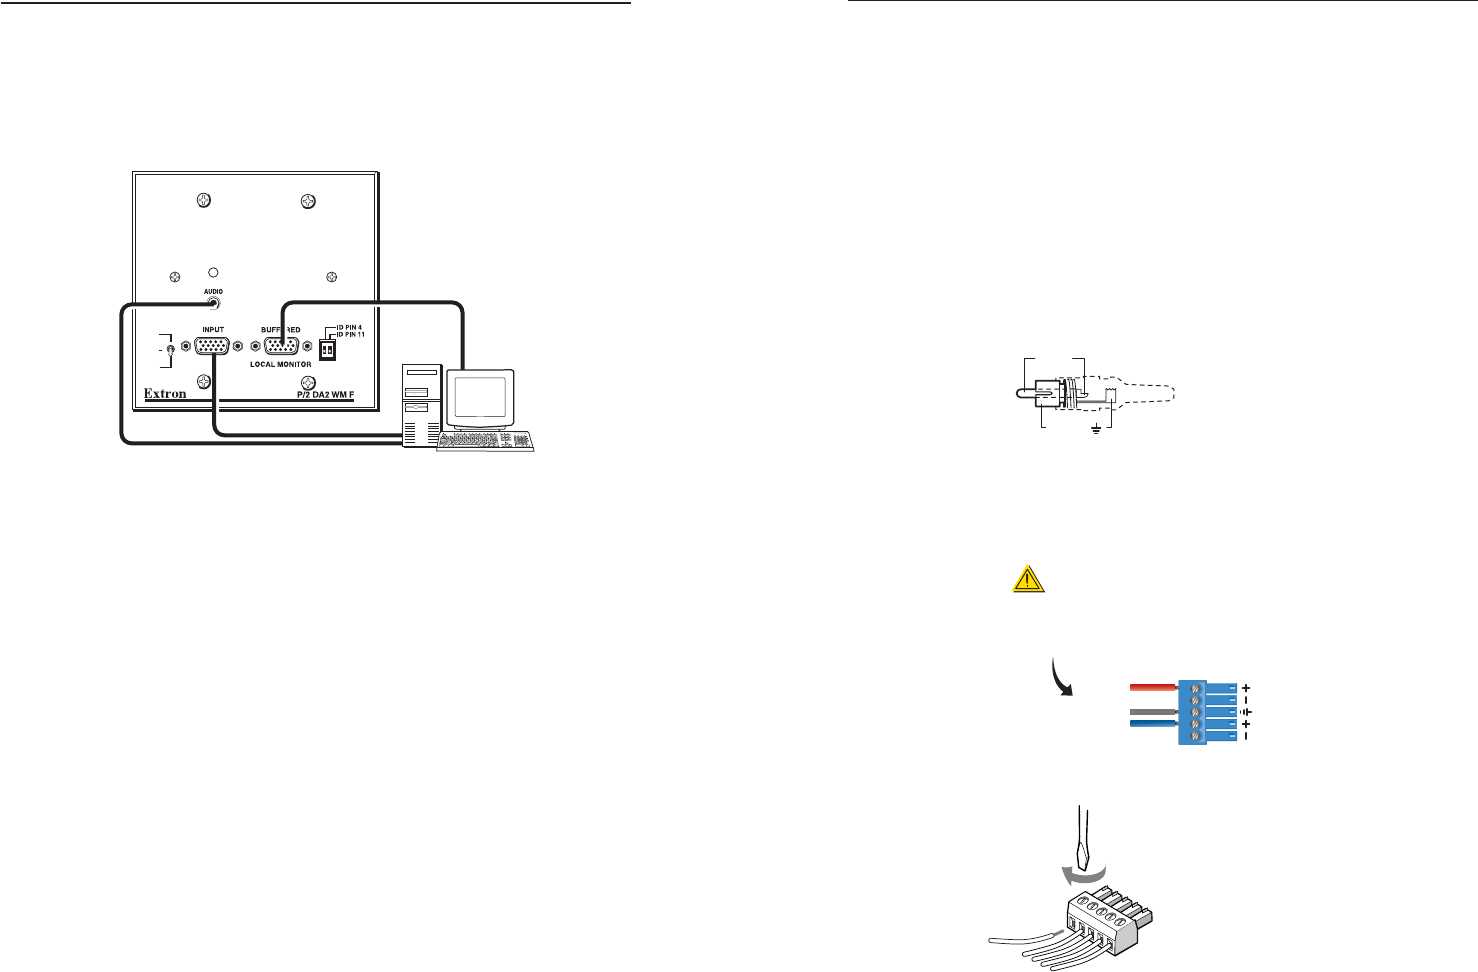
The P/2 DA2 WM F cabling diagram below shows how to
connect input and output devices to the distribution amplifier’s
front panel. The P/2 DA2 WM EC F model has identical
connectors.
AUTO POWER
100%
UNITY
50%
GAIN/PEAKING
P/2 DA2 WM F cabling
1. Connect your display device to the 15-pin HD female
video output VGA connector on the rear of the
P/2 DA2 WM F/EC F.
2. For audio output, refer to the section “Connecting audio
output” and connect the audio output cable to the 3.5 mm
captive screw connector on the rear of the P/2 DA2 WM
F/EC F.
3. Connect the power input cable to the rear power input
connector of the P/2 DA2 WM F/EC F.
4. Connect the computer’s video cable to the 15-pin HD
female input cable on the distribution amplifier’s faceplate.
5. If a local monitor is being used, connect the monitor to the
15-pin HD female buffered local monitor output on the
faceplate.
6. For audio input, connect the input device into the front
faceplate’s 3.5 mm female audio jack.
2-10


