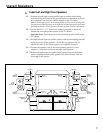
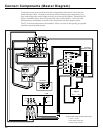
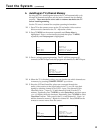
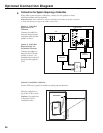
Connect Components
➤
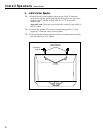
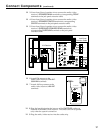
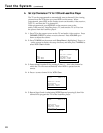
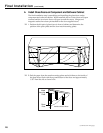
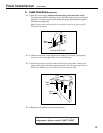
Connect VCR
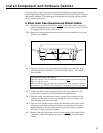
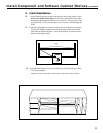
The following items supplied in the accessory kit will be needed to connect the VCR: One six
foot three-wire audio/video cable, one six foot two-wire audio cable, one three foot coaxial
cable, and two phono-to-phono Y-adapters. After the VCR is connected, plug it into the
outlet strip so the power to the clock is not interrupted.
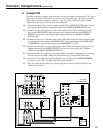
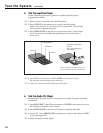
❑ 1.Connect the single plug of one Y-adapter into the VCR’s AUDIO R OUTPUT jack. Connect
the single plug of the other Y-adapter into the VCR’s AUDIO L/MONO OUTPUT jack.
❑ 2.Attach one end of the three-wire audio/video cable to the VCR by inserting the yellow
plug in the VIDEO OUTPUT jack, red plug in the Y-adapter attached to the AUDIO R
OUTPUT jack, and the white plug in the Y-adapter attached to the AUDIO L/MONO
OUTPUT jack.
❑ 3.Attach the other end of the three-wire audio/video cable to the jack panel extension cable
by inserting the yellow plug in the VIDEO INPUT 1 jack, red plug into the AUDIO INPUT
1 R/MONO jack, and the white plug into the AUDIO INPUT 1 L jack.
❑ 4.Attach one end of the two-wire audio cable to the VCR by inserting the red plug in the Y-
adapter attached to the AUDIO R OUTPUT jack, and the white plug in the Y-adapter
attached to the AUDIO L/MONO OUTPUT jack.
❑ 5.Attach the other end of the two-wire audio cable to the audio/video receiver by inserting
the red plug into the VCR 1 IN R jack, and the white plug into the VCR 1 IN L jack.
❑ 6.Attach one end of the three foot RF cable that came packed to the IN FROM ANTENNA
connector on the VCR. The other end will be connected later.
❑ 7.Plug the VCR into the outlet strip. Do not plug the VCR into a switched outlet on the
audio/video receiver.