


The Power-up Sequence 25
Mounting
Instructions for Wood
Walls
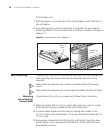
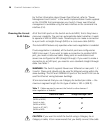
To wall mount the unit on a wood wall, follow these instructions:
1 Make two holes 150 mm (5.9 in.) apart.
2 Fix two suitable screws directly into the wall, leaving their heads 3 mm
(0.12 in.) clear of the wall surface. The screws should be at least 20 mm
(0.75 in.) long.
3 Remove any connections from the Switch and locate it over the screw
heads. When in line, gently push the Switch on to the wall and move
downwards to secure.
CAUTION: When making connections, be careful not to push the Switch
up and off the wall.
CAUTION: Only wall mount single units, do not wall mount stacked
units.
The Power-up
Sequence
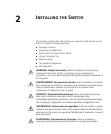
The following sections describe how to get your Switch powered-up and
ready for operation.
Powering-up the
Switch
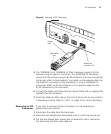
Use the following sequence of steps to power-up the Switch.
1 Plug the power adapter into the power socket at the rear of the Switch.
2 Plug the other end of the power cord into your power outlet.
3 The Alert LED will flash orange while the Switch is starting up.
4 When the unit is ready, the Power LED lights green and the Alert LED is
off.
The Switch powers-up and runs through its Power On Self Test (POST),
which takes approximately 60 seconds.