


44 CHAPTER 3: MANAGING YOUR SWITCH
Press ENTER to get started.
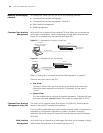
Login authentication
Username:admin
Password:
<4210>
%Apr 1 23:57:15:490 2000 4210 SHELL/5/LOGIN:- 1 - admin(aux0) in
unit1 login
<4210>
3 Enter the system-view command and press Enter. The [4210] prompt is
displayed.
4 Enter interface vlan 1 and press Enter.
5 Enter the IP address and subnet mask for the switch as follows:
ip address xxx.xxx.xxx.xxx mmm.mmm.mmm.mmm
and press Enter.
(where xxx.xxx.xxx.xxx is the IP address and mmm.mmm.mmm.mmm is the subnet
mask of the switch)
6 Select the quit command and enter the default gateway for the switch:
ip route-static 0.0.0.0 0.0.0.0 xxx.xxx.xxx.xxx
(where xxx.xxx.xxx.xxx is the IP address of the default gateway)
7 From the User View, type save to save the switch’s configuration (this information
is not saved automatically when the switch is powered down).
You can now set up your chosen management method. See “Methods of
Managing a Switch” on page 36.
If you do not intend to use the command line interface using the console port to
manage the switch, you can disconnect the serial cable and close the terminal
emulator software.
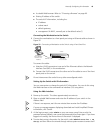
Connecting to a Front
Panel Port
You can manage your switch, including changing IP address information, by
making a connection to a front panel port. You can then access the Command
Line Interface or the Web interface, as desired. To do this you will need an IP
address, refer to “Viewing Automatically Configured IP Information” on page 40
for more information.
The procedure described in this section assumes the unit has been powered up in
standalone mode.
Prerequisites
■ A workstation running a suitable operating system. Refer to “Choosing a
Browser” on page 48.
■ A Network Interface Card (NIC).
■ A Category 5 twisted pair Ethernet cable with RJ-45 connectors at both ends.