


Installation and Troubleshooting 2 - 7
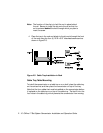
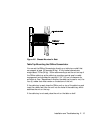
Installing the Cable Tray
The cable tray that comes standard with the concentrator helps to manage
the cables that run from the front of the unit so they are fed under the unit
and out through the back. The tray also provides the required space
between the bottom of the unit and the next device in the rack (or the top
of the table) so there is adequate air flow to cool the unit.
Caution: If you choose not to use the cable tray beneath your
unit, you must ensure that 1 3/4" (4.45 cm) of space is
open below the ONline unit to ensure adequate
incoming airflow (provided by the installed feet).
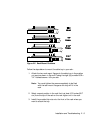
4 Set up the power supply. “Selecting the Power Supply
Voltage”
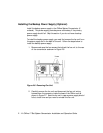
5 Install the ONline Controller
Module in the concentrator.
“Installing ONline Modules”
6 Install media modules in the
concentrator.
“Installing ONline Modules”
7 Connect the network
cables to the media
modules.
“Connecting Network Cables”
8 Power up all network
devices and verify the
installation.
“Power Up and Verification”
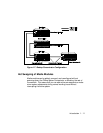
Table 2-1. Steps for Installing the ONline System Concentrator
(Continued)