3M 1998 3M Multimedia Projector MP8610 13
6-3. Replacing the Lamp
!
Caution
Always unplug the projector when changing the
lamp. There are high voltage parts inside the
cabinet that may
cause electric shock
.
!
Caution
Allow the projector to cool down for 30 minutes.
Lamp and adjacent metal parts become
extremely hot and can cause
burns to your
fingers.
1.
Press the Standby button on the projector control panel or remote control and wait for the fan
motor to cycle off.
2.
Turn off the power switch and unplug the projector power cord.
3.
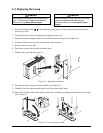
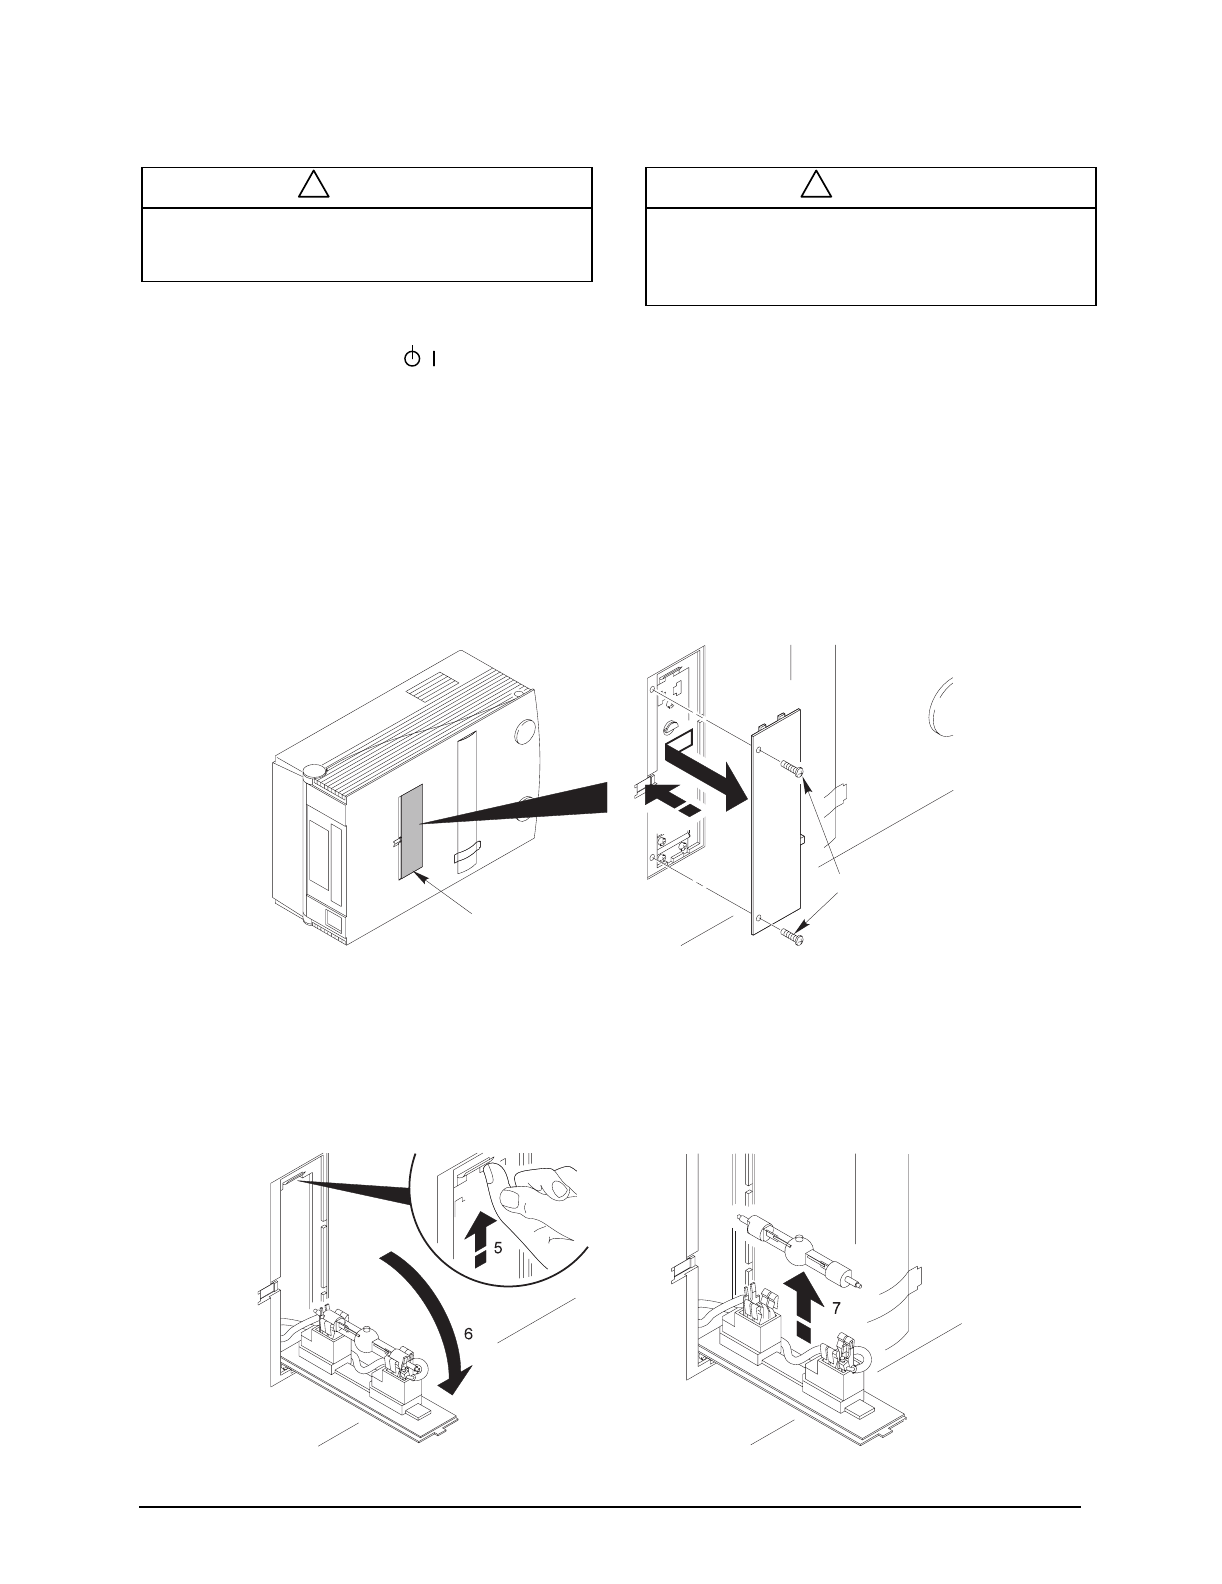
Stand the projector upright on the left side with the bottom facing you (see figure 6-1).
4.
Locate the lamp access door
(1)
on the bottom of the projector.
5.
Remove the two screws
(2)
.
6.
Push down on the lock tab
(3)
to release the door.
7.
Slide the door open
(4)
and remove it.
Figure 6-1. Removing Lamp Door
8.
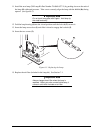
Press the tab
(5)
to release the lamp assembly (see figure 6-2).
9.
Carefully lower the lamp assembly
(6)
to access the metal halide lamp.
10.
The lamp is double ended with sockets on both sides. Carefully pull upward on both ends of the lamp
(7)
to remove it.
Figure 6-2. Lower Lamp Assembly
2
4
1
3
8610-13A


