


9
3M
™
Personal Projector MP7630B/MP7730B
© 3M IPC 2001
Introduction
The MP7630B/MP7730B Personal Projector integrates ultra-high bright lamp and TI
™
DLP
™
technology into a
single unit.
The MP7630B/MP7730B Personal Projector offers the following features:
• Small and portable unit • Ability to display 16.7 million colors
• Easy to set up and use • Full function remote control
• SVGA resolution and component video compatible • Digital keystone correction
(MP7730B: XGA resolution) • IR remote control sensor on top
• Horizontal and vertical image inverting • On screen menus in seven languages
• Horizontal and vertical image position control • Color balance control for data/video
• Ultra-high brightness projection lamp • RS-232 control capability
The MP7630B/MP7730B Personal Projector offers the following optional features:
• Attachable video module • Cable television (CATV) tuner
✓
Note: The brightness of your machine will vary depending on the ambient room conditions and contrast/
brightness settings.
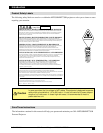
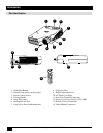
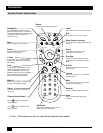
Machine Characteristics
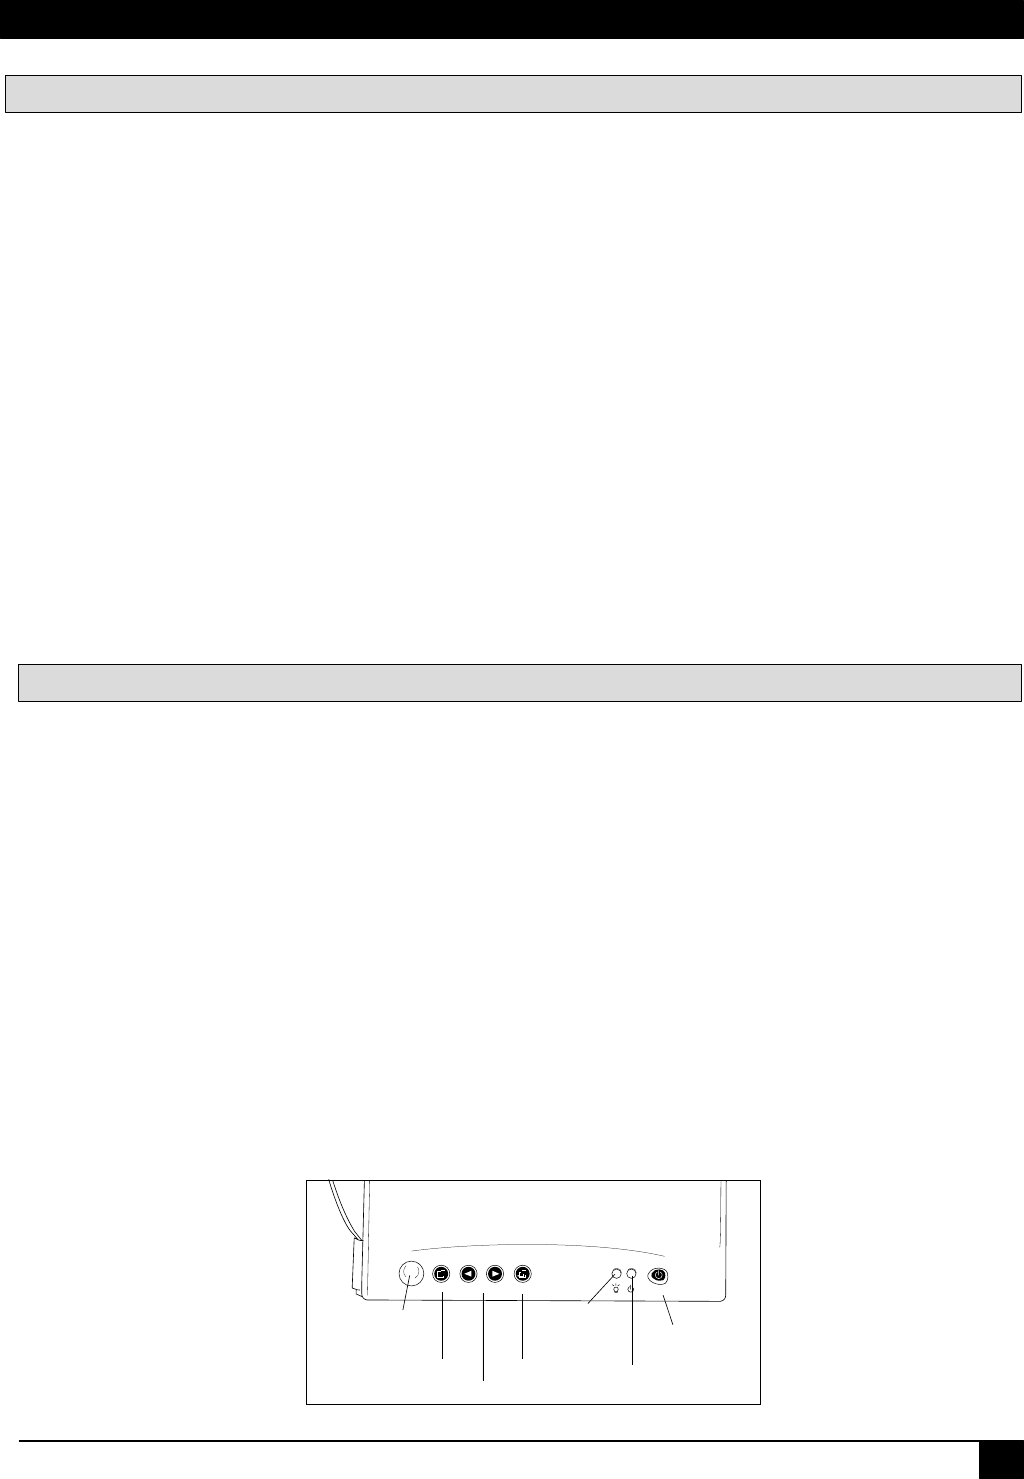
Auto
- Keystone +
MENU
AUTO- KEYSTONE +
STANDBY/ON
Infrared
Remote
Receiver
Menu
Lamp
Status
Indicator
Standby/On
Indicator
Standby/On
Button
External Control Pad Buttons
The External Control Pad is located on top of the projector, near the back end.
The Infrared Remote Receivers allow the projector to accept signals from the remote control. For best
results, be sure to aim the control toward the sensors, without any obstructions between the two, and at a
distance no greater than 4 meters (13 feet).
The Menu button will display the menu system onscreen. Press Menu again to access the sub-menus.
The Keystone buttons help correct keystone distortion of a projected image. The Keystone + button corrects
distortion in the upper part of the image. The - Keystone corrects it in the lower part. When you are viewing
the onscreen menus, the Keystone buttons help navigate among choices and settings in the sub-menus.
Press the Auto button to automatically adjust a projected image on screen. When you are viewing the onscreen
menus, press Auto to go back to the Main Menu. Press Auto again to exit the menu system.
The Lamp Status Indicator will blink or light up when the lamp needs service, cooling or replacement. See
page 34 for more detailed information.
When the projector is turned on, the Standby/On Indicator will blink during warm-up and lamp ignition,
then stay green to indicate the projector is ready for use.
Press the Standby/On Button to turn the projector on or off.