


1-6 Microprocessor Upgrade Installation Guide
DELL CONFIDENTIAL - Preliminary 9/11/00
(Rev. 11/3/98) FILE LOCATION: S:\SYSTEMS\SlimFast\ts\ProcUpgrade\028WD\028wdeb0.fm
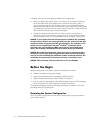
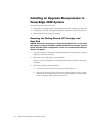
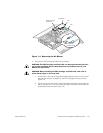
)LJXUH5HPRYLQJWKH6(&&DUWULGJHDQG+HDW6LQN)URPWKH
3RZHU(GJH
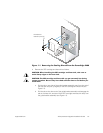
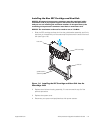
,QVWDOOLQJWKH1HZ6(&&DUWULGJHDQG+HDW6LQNDQG
5HSODFLQJWKH&RROLQJ6KURXG
127,&($OOHPSW\PLFURSURFHVVRUFRQQHFWRUVPXVWEHSRSXODWHGZLWKD
WHUPLQDWRUFDUG,I\RXUV\VWHPVXSSRUWVPRUHWKDQRQHPLFURSURFHVVRU
DQG\RXDUHQRWLQVWDOOLQJWKHPD[LPXPQXPEHURIPLFURSURFHVVRUVWKH
UHPDLQLQJPLFURSURFHVVRUFRQQHFWRUVPXVWKDYHDWHUPLQDWRUFDUG
127,&(7KHWHUPLQDWRUFDUGPXVWEHUDWHGWRUXQDW0+]
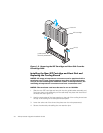
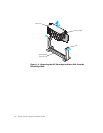
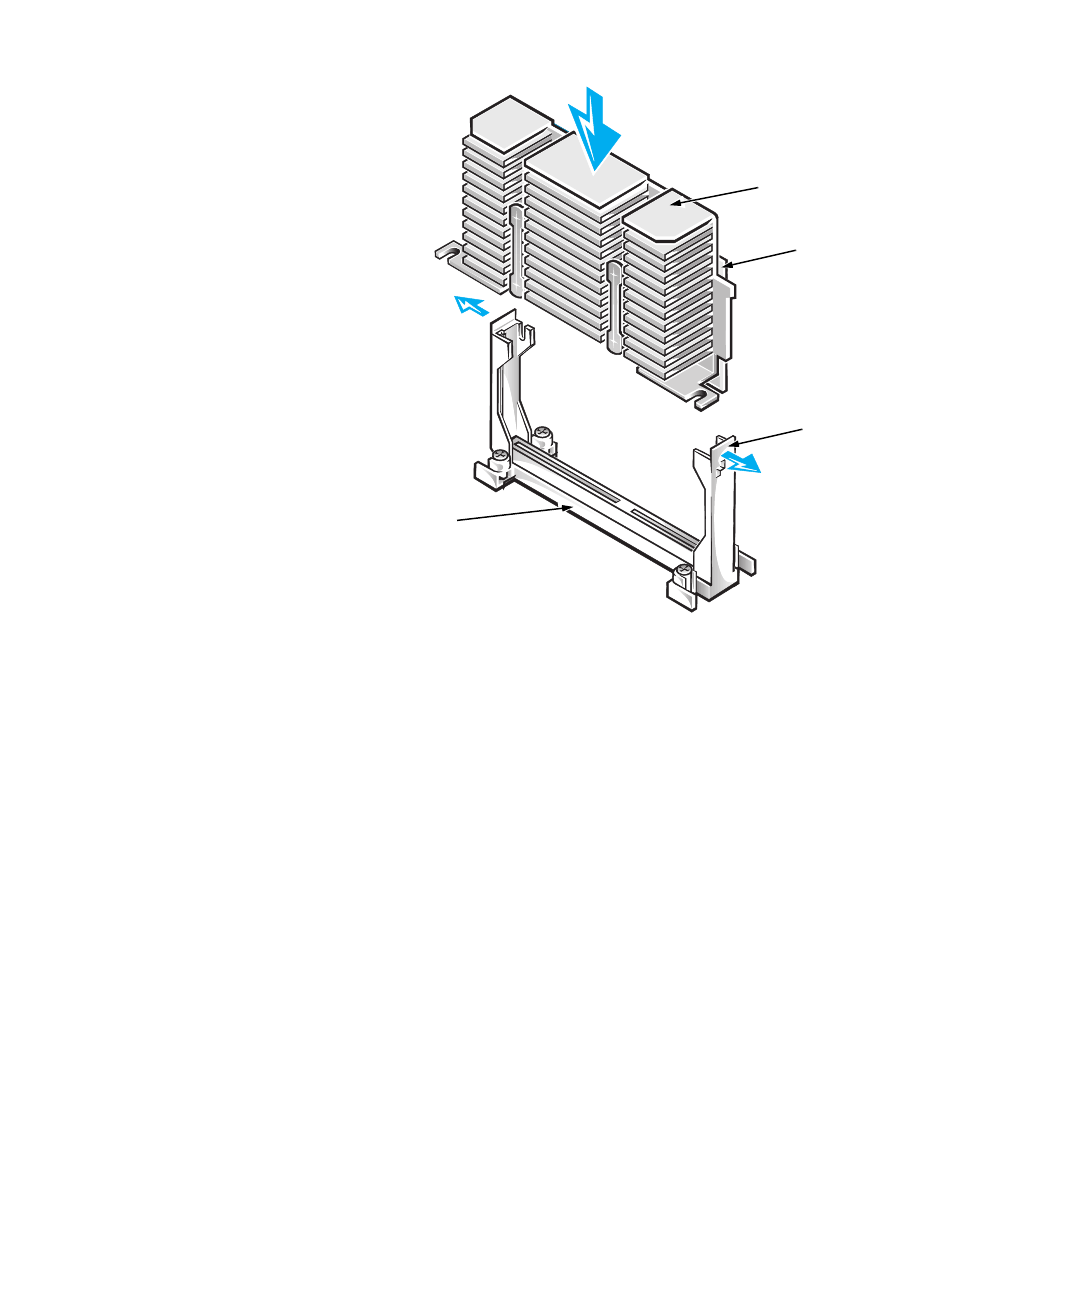
1. Slide the new SEC cartridge and heat sink into the guide-bracket assembly, and
firmly seat them in the assembly until the tabs snap into place over the ends of
the heat sink (see Figure 1-3).
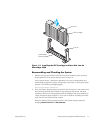
2. Hook the upper edge of the large opening on the end of the cooling shroud over
the top of the cooling fan on the system’s back panel.
3. Lower the other end of the shroud into place over the microprocessor(s).
4. Secure the shroud by reinstalling the two retention pins.
tab (2)
guide-bracket
assembly
heat sink
SEC cartridge