


1-4 Microprocessor Upgrade Installation Guide
DELL CONFIDENTIAL - Preliminary 9/11/00
(Rev. 11/3/98) FILE LOCATION: S:\SYSTEMS\SlimFast\ts\ProcUpgrade\028WD\028wdeb0.fm
,QVWDOOLQJDQ8SJUDGH0LFURSURFHVVRULQ
3RZHU(GJH6\VWHPV
This section provides instructions for:
Removing the cooling shroud, single-edge contact (SEC) cartridge, and heat sink
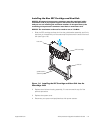
Installing the new SEC cartridge and heat sink and replacing the cooling shroud
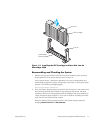
Reassembling and checking the system
5HPRYLQJWKH&RROLQJ6KURXG6(&&DUWULGJHDQG
+HDW 6LQN
127,&()ROORZWKHLQVWUXFWLRQVLQ´3UHFDXWLRQDU\0HDVXUHVµWRHQVXUHWKDW
WKHV\VWHPLVSURSHUO\VKXWGRZQDQGGLVFRQQHFWHGIURPDOOSRZHUVRXUFHV
(QVXUHWKDWWKHV\VWHPFRQILJXUDWLRQVFUHHQVDUHUHFRUGHGDVGHVFULEHGLQ
´%HIRUH<RX%HJLQµ
1. Turn off the system, including any attached peripherals, and disconnect the power
cable from the electrical outlet.
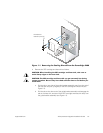
2. Remove the right-side system cover and bezel.
See your system Installation and Troubleshooting Guide for specific instructions,
if needed.
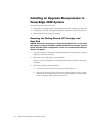
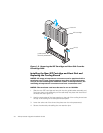
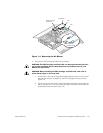
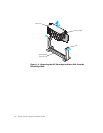
3. Remove the cooling shroud as follows:
a. Unscrew and remove the two retention pins (see Figure 1-1).
b. Remove the shroud by lifting the end of the shroud closest to the micropro-
cessor(s) until the opposite end of the shroud disengages from the cooling
fan on the system’s back panel (see Figure 1-1).