9
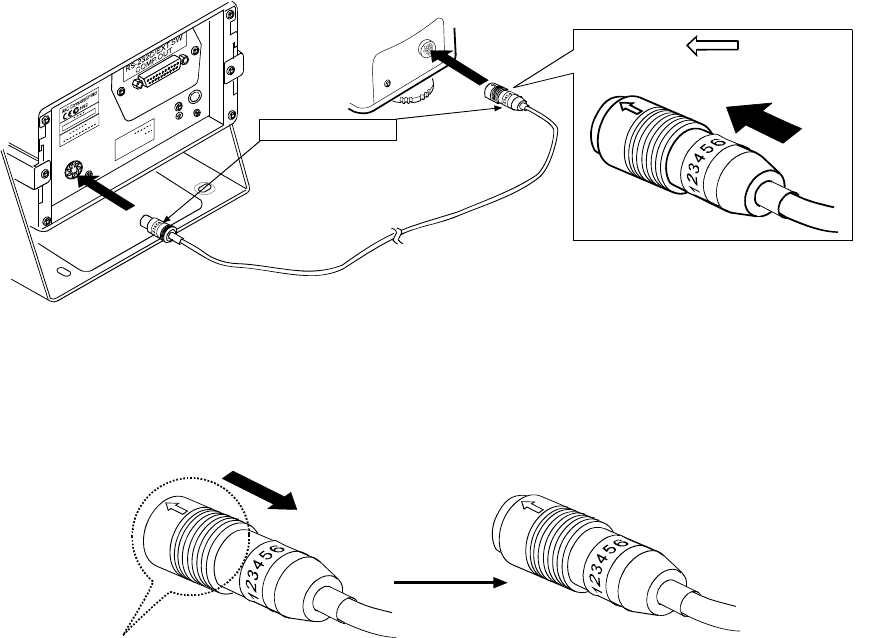
How to disconnect the cable from the weighing unit
Slide the connector sleeve in the direction of the arrow to unlock and gently pull the connector
out.
4. Adjust the leveling feet to level the weighing unit. Confirm it using the bubble spirit level.
5. Confirm that the adapter type is correct for the local voltage and power receptacle type.
6. Plug the AC adapter plug into the AC adapter jack located on the rear of the display unit and
plug the AC adapter into the electrical outlet. Warm up the balance for the appropriate duration
with nothing on the weighing pan.
AD-4212A series balance: 30 minutes or more
AD-4212B series balance: one hour or more
7. Set the pan unit and I/O unit to adapt to the peripheral system. Set the following for the I/O unit.
RS-232C (Refer to page 63)
Comparator contact output (Refer to page 64)
RE-ZERO operation using external contact input (Refer to page 64)
Auto-display ON function (Refer to pages 29 and 34)
Set the weighing speed to adapt to the ambient conditions.
8. After the balance has been installed, calibrate the balance using the calibration weight provided
with the balance. For details, refer to “8. CALIBRATION”.
9. A special weighing pan designed appropriately for the sample to be weighed or the peripheral
system can be attached to the balance. About how to design a weighing pan, refer to “24
DESIGNING A SPECIAL WEIGHING PAN”.
Rear of the display unit
Rear of the weighing unit
Connection cable
Serial number
Make sure the weighing unit, display unit
and connection cable have the same
serial number.
Arrow mark
face up
Slide the connector sleeve
in the direction of the arrow
Unlocked


