Quick Startup Guide
Quick Start-4 Express 4110/4120 User Manual 61200176L3-1
24. If the call is successful, the Status column will read active. If not,
make sure the number(s) are correct or reference “Troubleshooting”
on page 4-1 before continuing.
25. Once the call is up, the PC must generate a DHCP request to obtain
the IP parameters needed to get on the Internet. Refer to your PC’s
user manual or help screen.
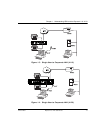
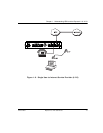
MULTIPROTOCOL ROUTING BETWEEN TWO LANS
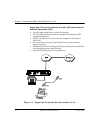
Remote/Home Office Accessing the Corporate LAN
The following steps can be used to set up the Express 4110/4120 on a
remote LAN to access a corporate or central LAN using demand dial and
dynamic bandwidth management.
1. Connect the Express 4110/4120 to the 10BaseT LAN.
2. Set the IP address and Subnet Mask assigned by the network admin-
istrator in the Configuration/IP menu.
3. For the Default Gateway, enter the IP address of the access server at
the remote site. This creates a default route in the IP routing table that
will be used with the dial-on-demand feature in the Express 4110/
4120.
4. Use the arrow keys to get to the Configuration/IPX menu. Set the
Network value to the IPX network supplied by the network adminis-
trator. Set the Seed Status to Seed. Arrow left and save the changes
with a y when prompted.
5. Move to the Configuration/Connection List. Use the arrow keys to
move the cursor over the Num column. Type I to insert a new entry.
6. Move the cursor over the Description field and press Enter. A pop-up
window appears in which to enter a name for this Connection List
profile.
7. Move the cursor over the Authentication menu and press Return.
This will place the authentication parameters into the right pane.
8. Enter the username and password under Tx Username and Tx Pass-
word. These items should be provided by the administrator at the
site being dialed.
9. Use the down arrow to display the IP menu parameters in the right
pane.
10. Move the cursor over the Route menu and press Return.


