


PPPoAĆtoĆPPTP
Relaying configuration
Creating a PPTP
connection icon
2 Speed Touch Configuration Guide
31 / 104
3EC 36228 AAAA TCZZA Ed. 01
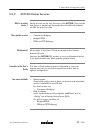
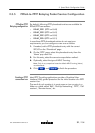
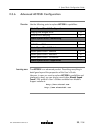
2.3.5 PPPoAĆtoĆPPTP Relaying Packet Service Configuration
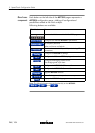
Per default, following PPTP phonebook entries are available for
PPPoA/PPTP connections:
" RELAY_PPP1 (PPTP on 8.48)
" RELAY_PPP2 (PPTP on 8.49)
" RELAY_PPP3 (PPTP on 8.50)
" RELAY_PPP4 (PPTP on 8.51)
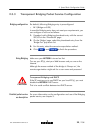
In case these PPTP phonebook entries do not meet your
requirements, you can configure a new one as follows:
1. If needed, add a PPTP phonebook entry with the correct
VPI/VCI on the 'Phonebook' page.
2. On the 'PPTP' page, select this phonebook entry from the
'Name' popĆdown list.
3. For this entry, select the correct encapsulation method.
4. Optionally, select the type of HDLC Framing.
Note: Only in very exceptional cases the default HDLC framing (Never)
must be altered.
5. Click and to finish the procedure.
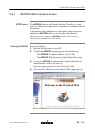
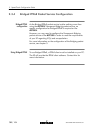
Most PPTP Tunneling applications provide a Graphical User
Interface (GUI) guided procedure for the initial creation of a PPTP
session icon.
The result of such creation is in most cases an icon or entry in a
folder or a table called 'RAS', 'DialĆUp Networking', 'PPTP', 'Call
sessions', 'Remote Access', etc.