


Quick Install Guide 5
C613-04043-01 REV D
5. Place the switch in its operating location
If installing the switch in a rack:
• Remove the rubber feet
• Attach the rack-mounting brackets.
Use the screws provided with the switch to mount it in a rack. Other screws
may damage the switch.
• Mount the switch in the rack
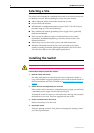
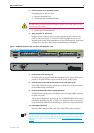
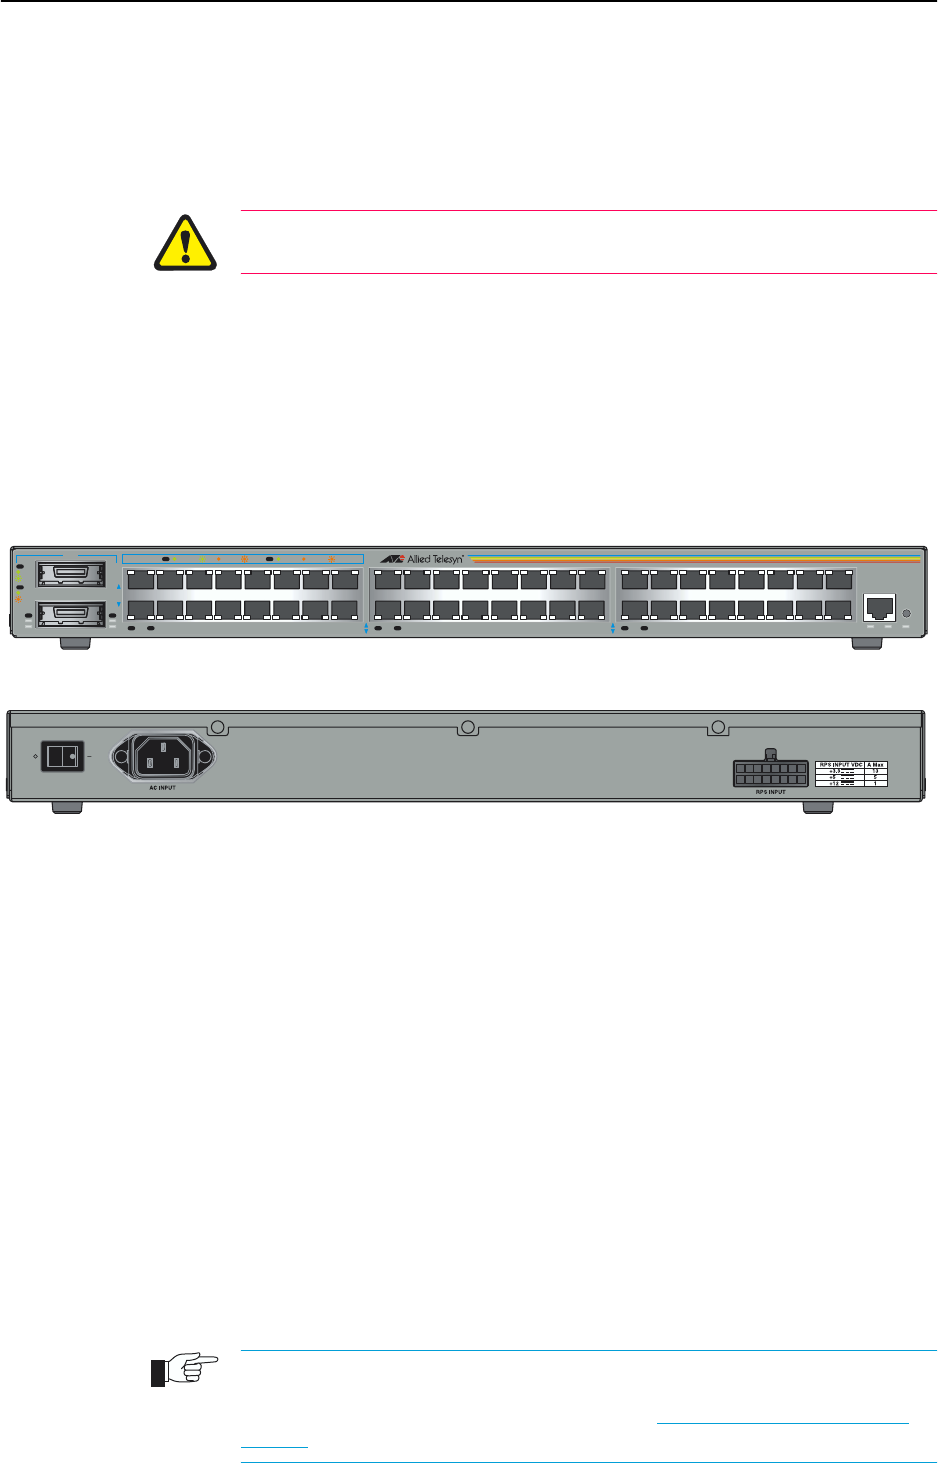
6. Apply AC power to the switch
Plug the power cord into the AC power connector on the switch’s rear
panel, as shown in Figure 1. The FAULT LED may light for one or two
seconds as the switch runs internal tests. If the LED remains lit, refer to the
AT-8800 Series Hardware Reference for troubleshooting information.
Figure 1: AT-8848 front panel and rear panel with AC power inlet.
7. Fit the power cord retaining clip.
A retaining clip is supplied with the switch for the AC power inlet on the
switch’s rear panel. Fit this clip to secure the power cord in place.
8. Check that the Power LED on the switch’s front panel lights green
If the PWR LED fails to light, refer to the AT-8800 Series Hardware Reference
for troubleshooting information.
9. Connect the Redundant Power Supply (Optional)
AT-8800 Series switches have a Redundant Power Supply (RPS) connector
on their rear panel.
The Switch is designed to operate with the AT-RPS8000 RPS, which can be
purchased separately. See the AT-8800 Series Hardware Reference or contact
your authorised Allied Telesis distributer or reseller for more information.
10. Install GBICs (Optional)
Slide the GBICs into the GBIC slots. Press each GBIC firmly into place.
A range of GBICs have been tested and approved for use with AT-8800 Series switches.
See the AT-8800 Series Hardware Reference or contact your authorised Allied Telesis
distributor or reseller for more information, or visit www.alliedtelesis.com/support/
software.
49
50
49
50
LINK
ACT
L/A
L/A
GBIC
ENABLED
FAULT
GBIC
GBIC
D/CL/A
LINK 100M ACT
LINK 10M ACT
L/A
FULL DUP HALF DUP COL
PORT ACTIVITY
AT-8848
Intelligent Workgroup Switch
RESET
ASYN0
FAULT PWRRPS
33 35 37 39 41 43 45 47
34 36 38 40 42 44 46 48
1 3 5 7 9 11 13 15
2 4 6 8 10 12 14 16
17 19 21 23 25 27 29 31
18 20 22 24 26 28 30 32
D/CL/AL/A D/CL/AL/A D/CL/A