


Page 8
Printed in China.
© 2003-2008 American Innovative, LLC.
Setup
Getting Started
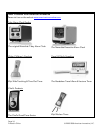
Unpack Teach Me Time! and plug the external AC adapter into
the back of the product. Next plug the AC adapter into a
standard wall outlet.
Teach Me Time! comes from the factory set to a special “in-
store demonstration” mode of the Teach Me Time! Game. To
exit this demonstration mode, press any key under the rear
hatch.
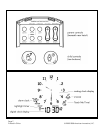
Setting the Time
The first time you plug in Teach Me Time! you must set the time:
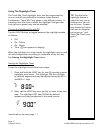
1. Press and hold the SETUP key for two (2) seconds to
enter set time mode. The numeric portion of the display
flashes and the word “SET” appears.
2. Adjust the time using the HR +/- and MIN +/- keys. Press
and hold these keys for one (1) second to scroll rapidly.
3. Tap the SETUP key once quickly to exit.
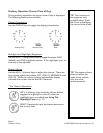
Battery Backup
Teach Me Time! comes from the factory with two AAA batteries
already installed. To replace the batteries, remove the screw
from the battery hatch (bottom of unit) using a small
screwdriver. If the hatch does not fall open freely, use your
fingernail or a paperclip to gently dislodge it.
NOTE: To conserve power, the nightlight and display backlight
features of Teach Me Time! do not work while running under
battery power.
NOTE: If the battery level is very low Teach Me Time! may not
have enough power to clearly announce the time or may
become unresponsive. In this event, please replace the
batteries with a fresh set.
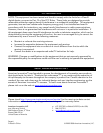
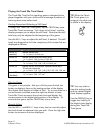
TIP: The rear hatch
conceals the parental
controls and is designed to
be “child proof”.
To open the hatch, place
your thumb on the latch
and gently push down and
back. You may flex the
cover slightly to facilitate
opening the hatch:
Do not attempt to open
the hatch by using a
fingernail to pull in an
upward direction as this
may break the latch
mechanism.
TIP: Included batteries are
intended for in-store
display. For best
performance, replace the
batteries with a fresh set
before first use.